Solving with Algebra Tiles
My grade 9 class this week has been working on solving equations. We used algebra tiles to help us visualize what we are doing, and to help us choose our next steps. Here are some examples of the process.
We represented each side of the equation, and drew a line where the equal sign is. We know that both sides are equal. Our goal is to get the variable tile alone on one side. We can do that a few different ways. Here we decided to create zero pairs for the +2 which is on the same side as the x. This will annihilate the +2, and we will have the x alone.
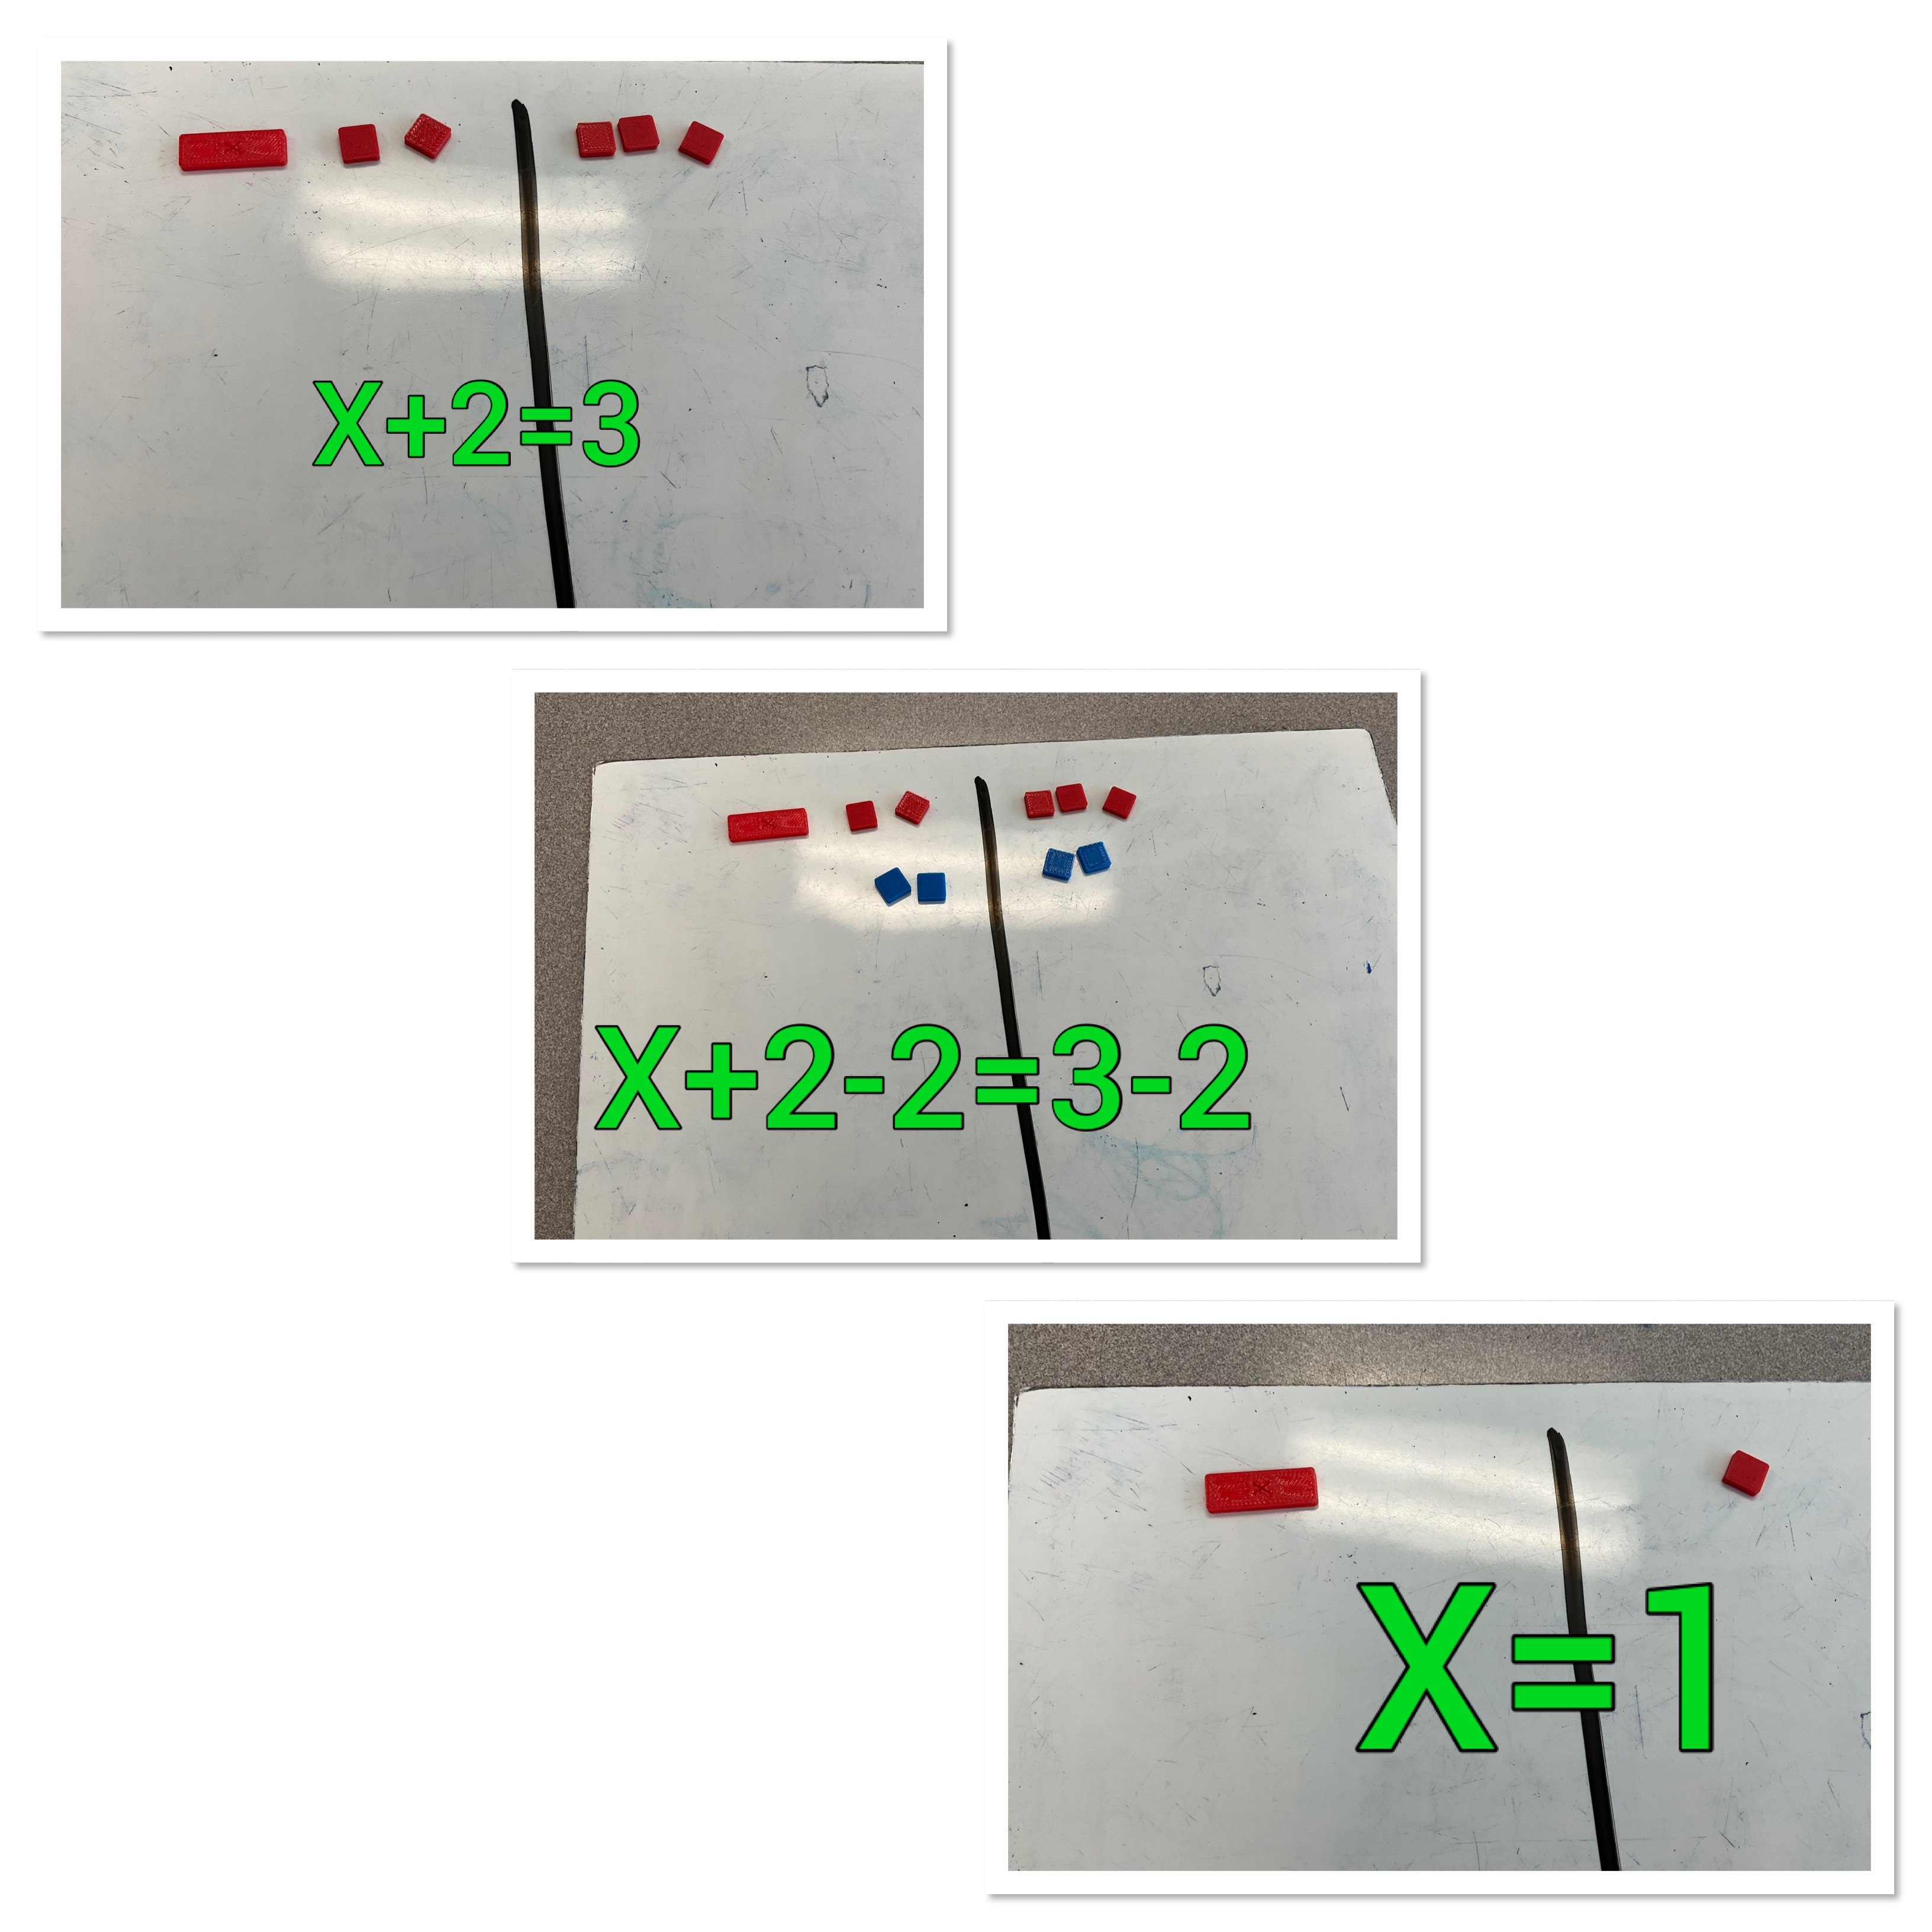
We have to do the same on both sides to keep the equation equal.
Here’s another example. We have variables on both sides here, which we are not thrilled about. To annihilate the -x on the right side, we place a +x to create a zero pair. We must place +x on the left as well to keep things equal. Next we place +3 on both sides which will create a zero pair with the -3 which is on the same side as the x term.

We end up with 3x=8. The next step is to split the 3x into 3 groups. We want each x to have its own group. We split the 8 up into 3 groups too. This is tricky since it doesn’t divide equally. We will have 2, and then we need to cut each of the little blocks remaining into thirds. Each group will get 1/3 of each remaining block. Wr end up with 2 and 2/3 as our answer for x.
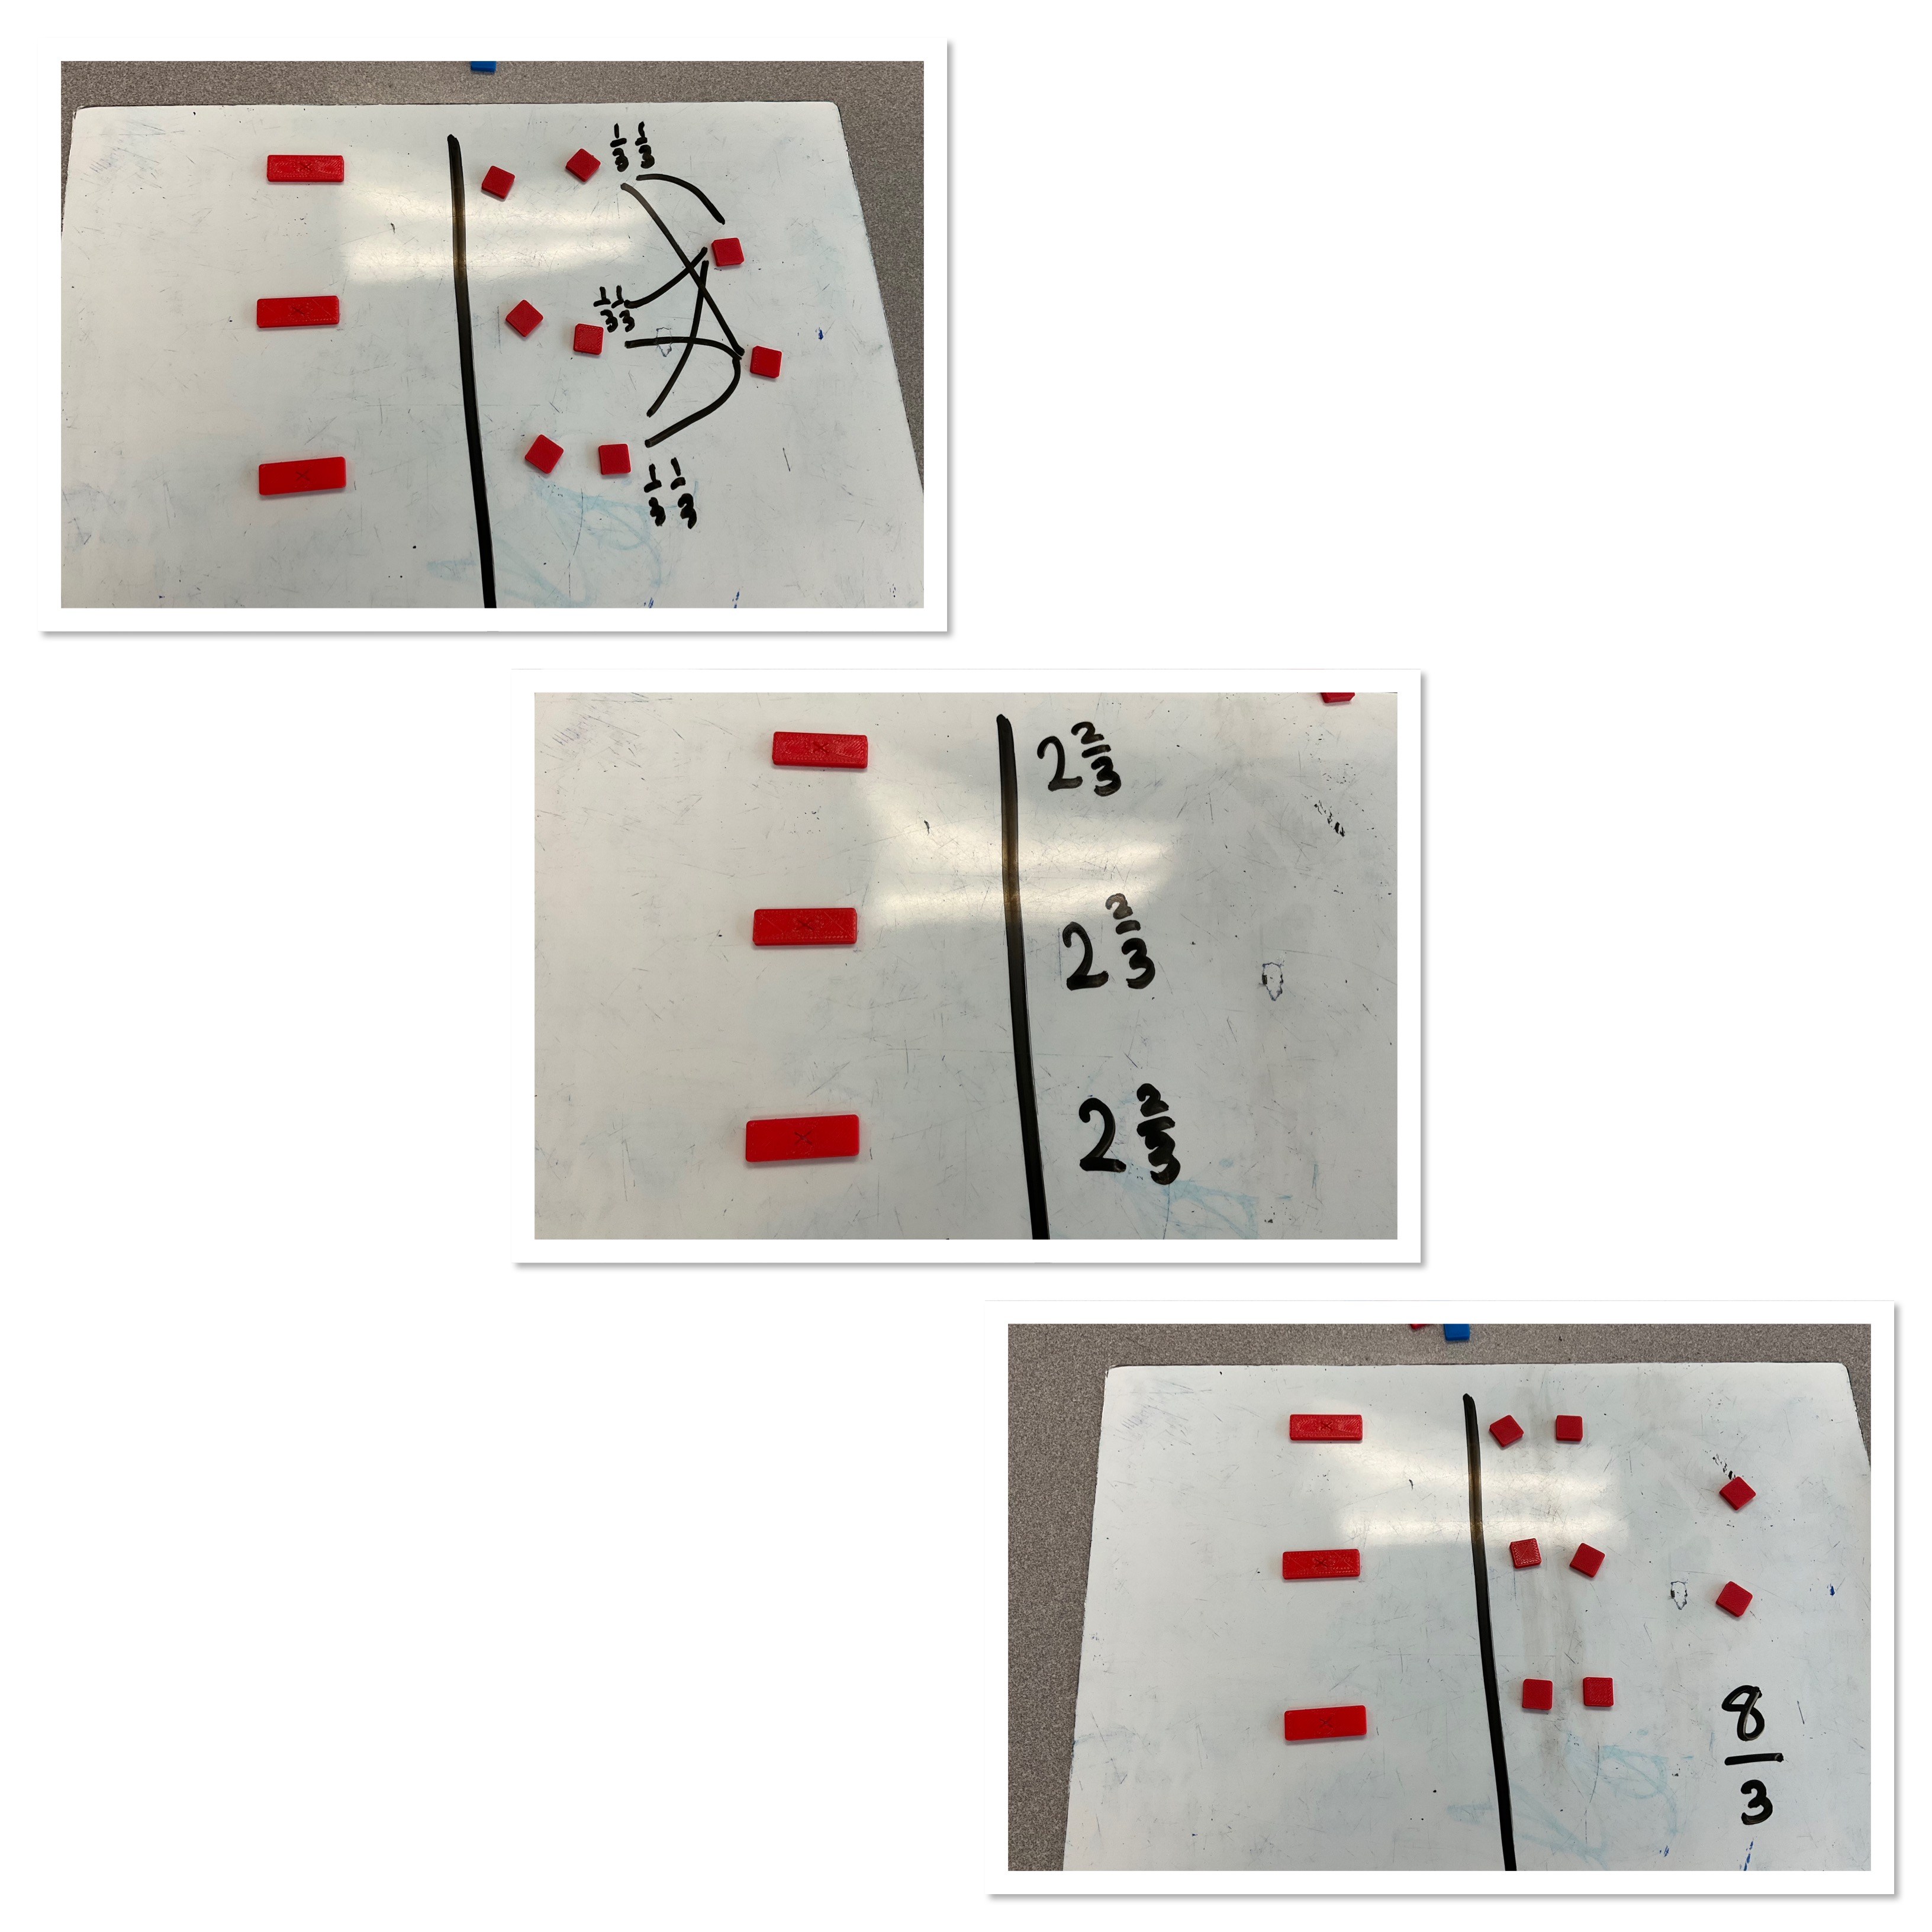
Another way to visualize this is to say that we have 8 blocks that we want to divide into 3 groups, and we represent x as the fraction 8/3, which is equivalent to 2 and 2/3.
We have worked on representing and solving lots of equations. Some students will use the tiles for quite a while. Others can make the connection to an algebraic representation, but the understanding remains that we use zero pairs and opposite operations to isolate x. Using the tiles helps us remember what our like terms are, and we physically see both sides all the time, and we know we must keep them equal by doing the same thing on both sides each time.
