Math Workshop
A colleague and I were invited to present a workshop after school all about fostering confident math learners. The audience was a group of elementary educators from our feeder schools.
We introduced our “graph our math life” task which we often do with our students. We thought back to how we felt as math learners and teachers over time. There is a big connection between feeling good about ourselves as math learners and how we will be able to progress through the productive struggles along the way. This task is based off of the work of Liesl McConchie.

We can use this as a springboard for conversations about what the stories we hear about math at home. Some of us grew up with positive experiences and messaging around math and challenge, and others have hit roadblocks where we didn’t have such positive feelings or messages. We know that students are hearing lots of messages at home or in pop culture. We want to be able to refute some of the negative messages they hear, and help them replace some negative self talk with more constructive messaging. Instead of I can’t do math, or math is hard, or I’m not a math person, they can say “math is tough but so am I” or “i can do hard things” or “i’m working on my math skills” or “i’m learning and asking for help”.
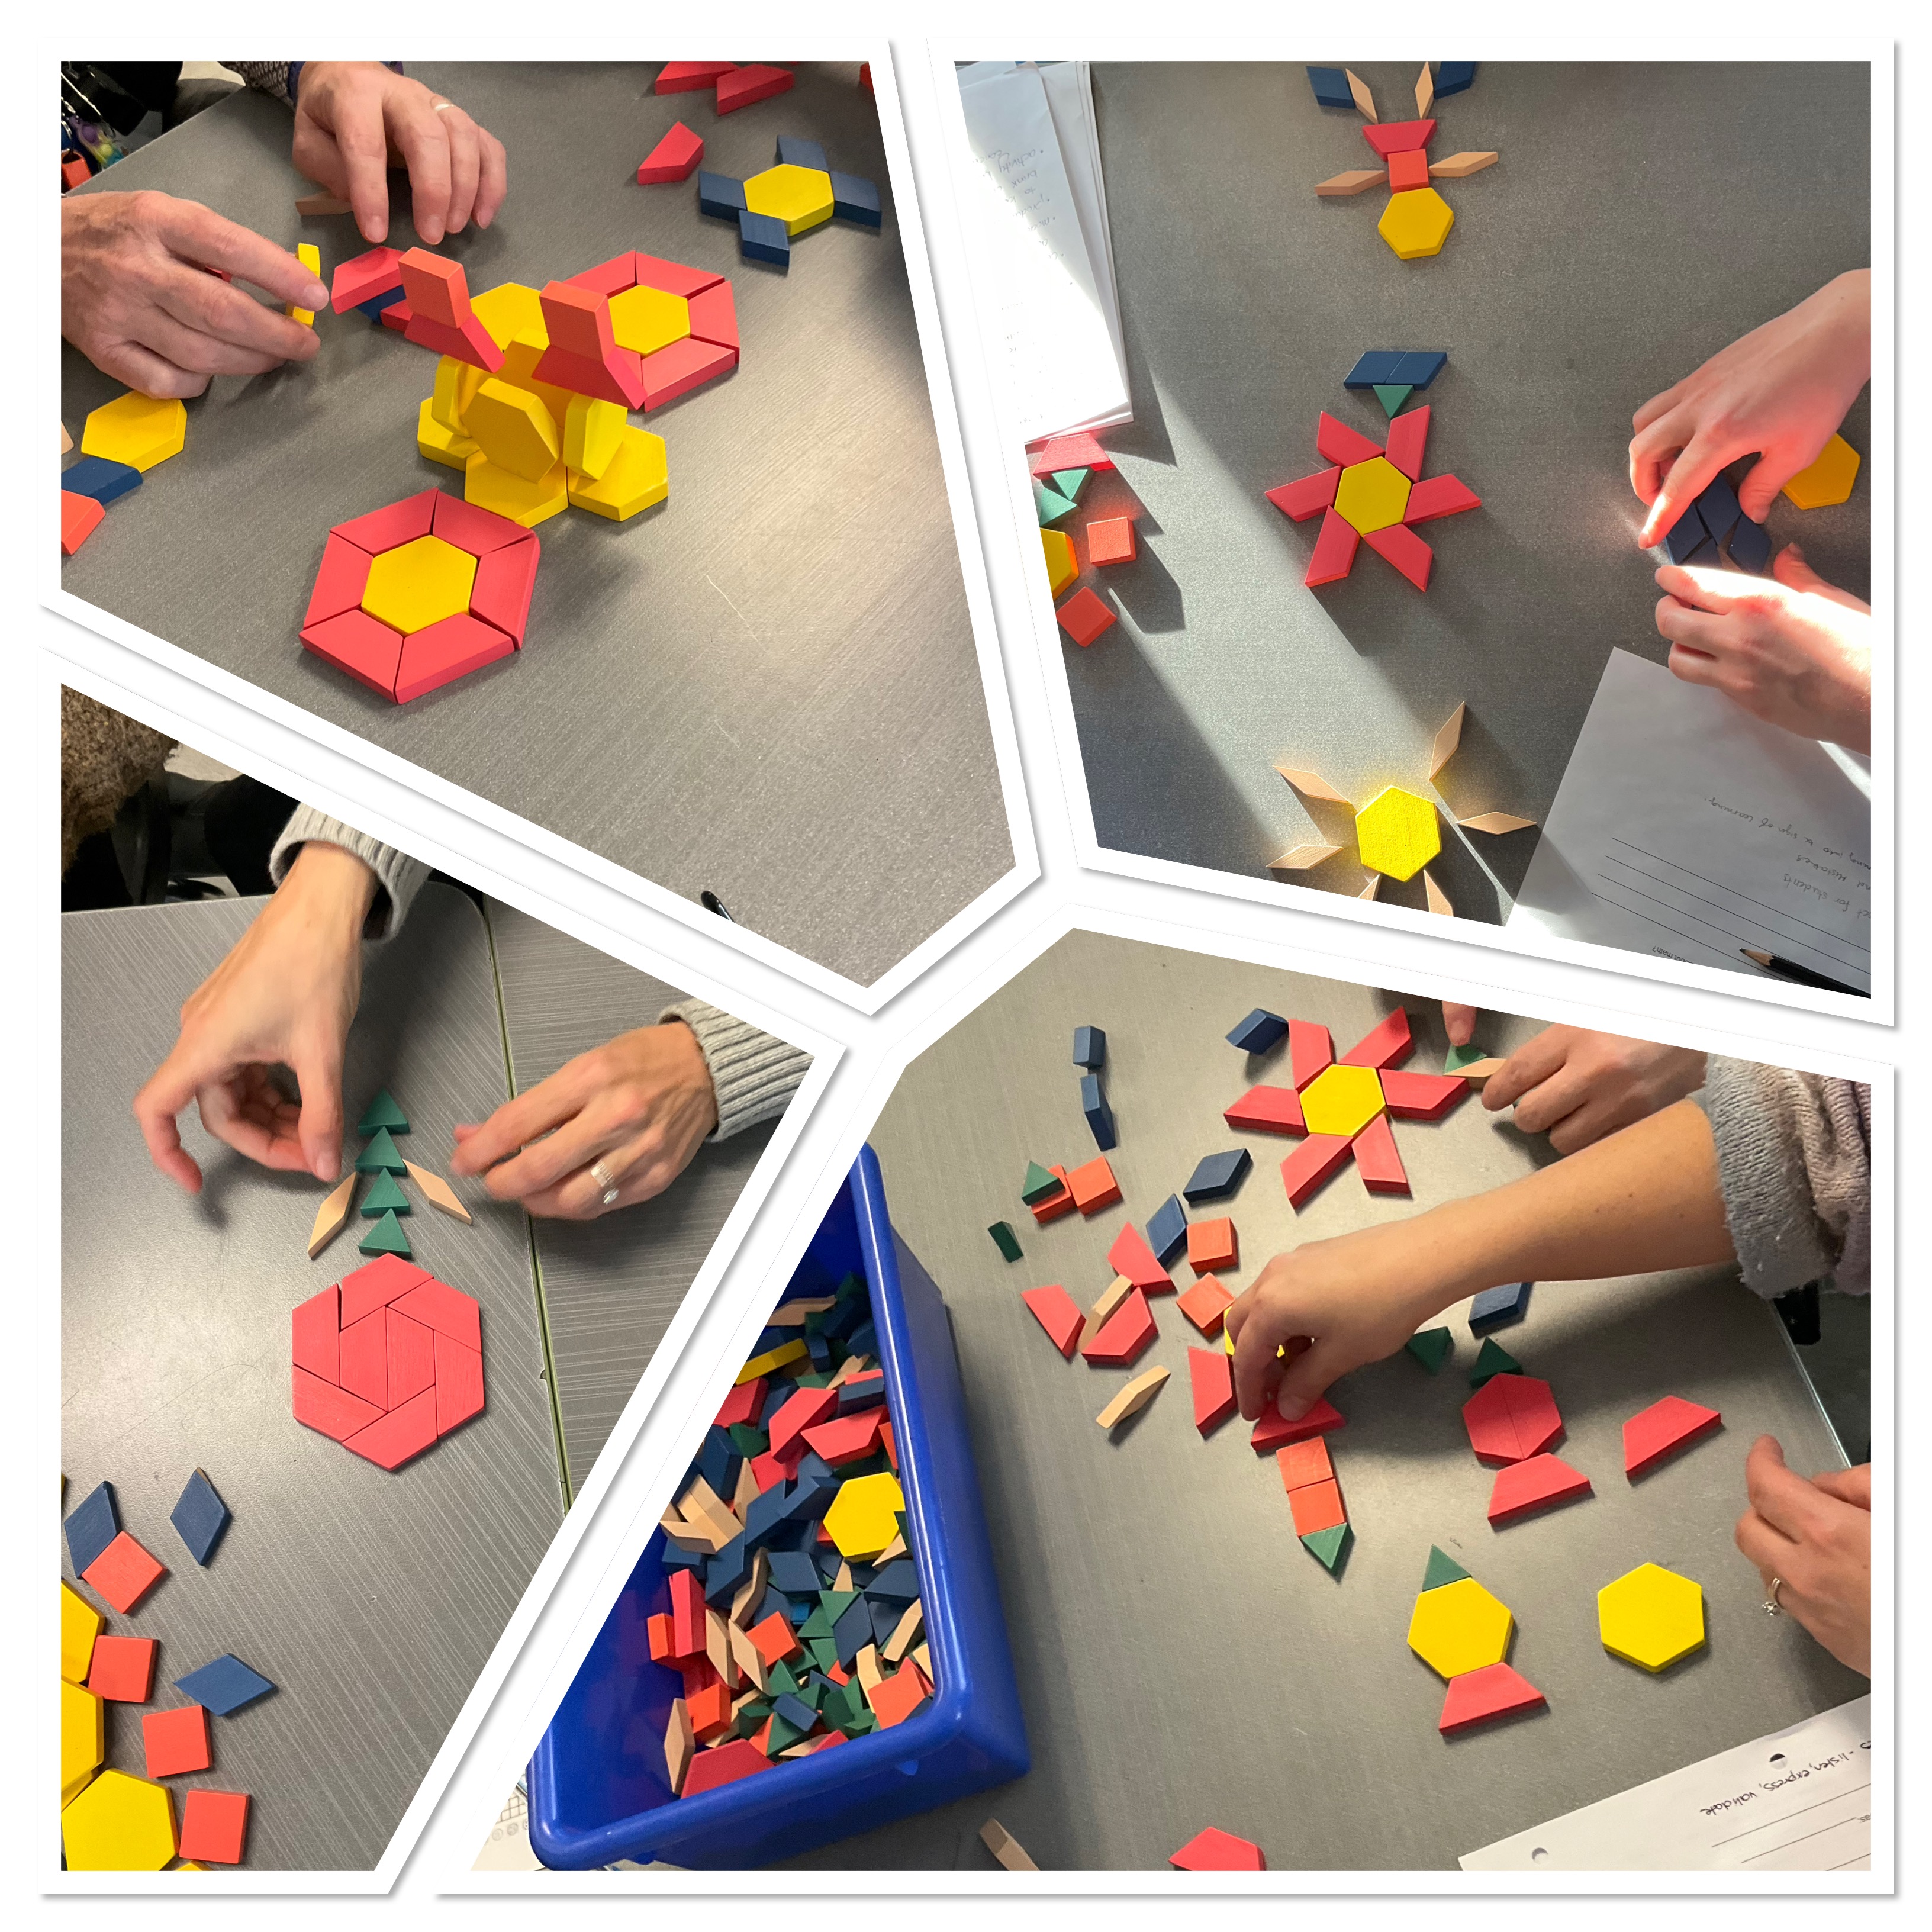
Our next task was to make some art with the patterning blocks. We looked at all the math we could see: rotational symmetry, lines of symmetry, fractions and percent of blocks that are of a certain colour, parallel lines, angles that are complementary, angles inside a polygon, perimeter, area…so many ideas. We also used the first letter of each colour and made an algebraic expression for each picture e.g. 1y+6r+1g+1b=flower
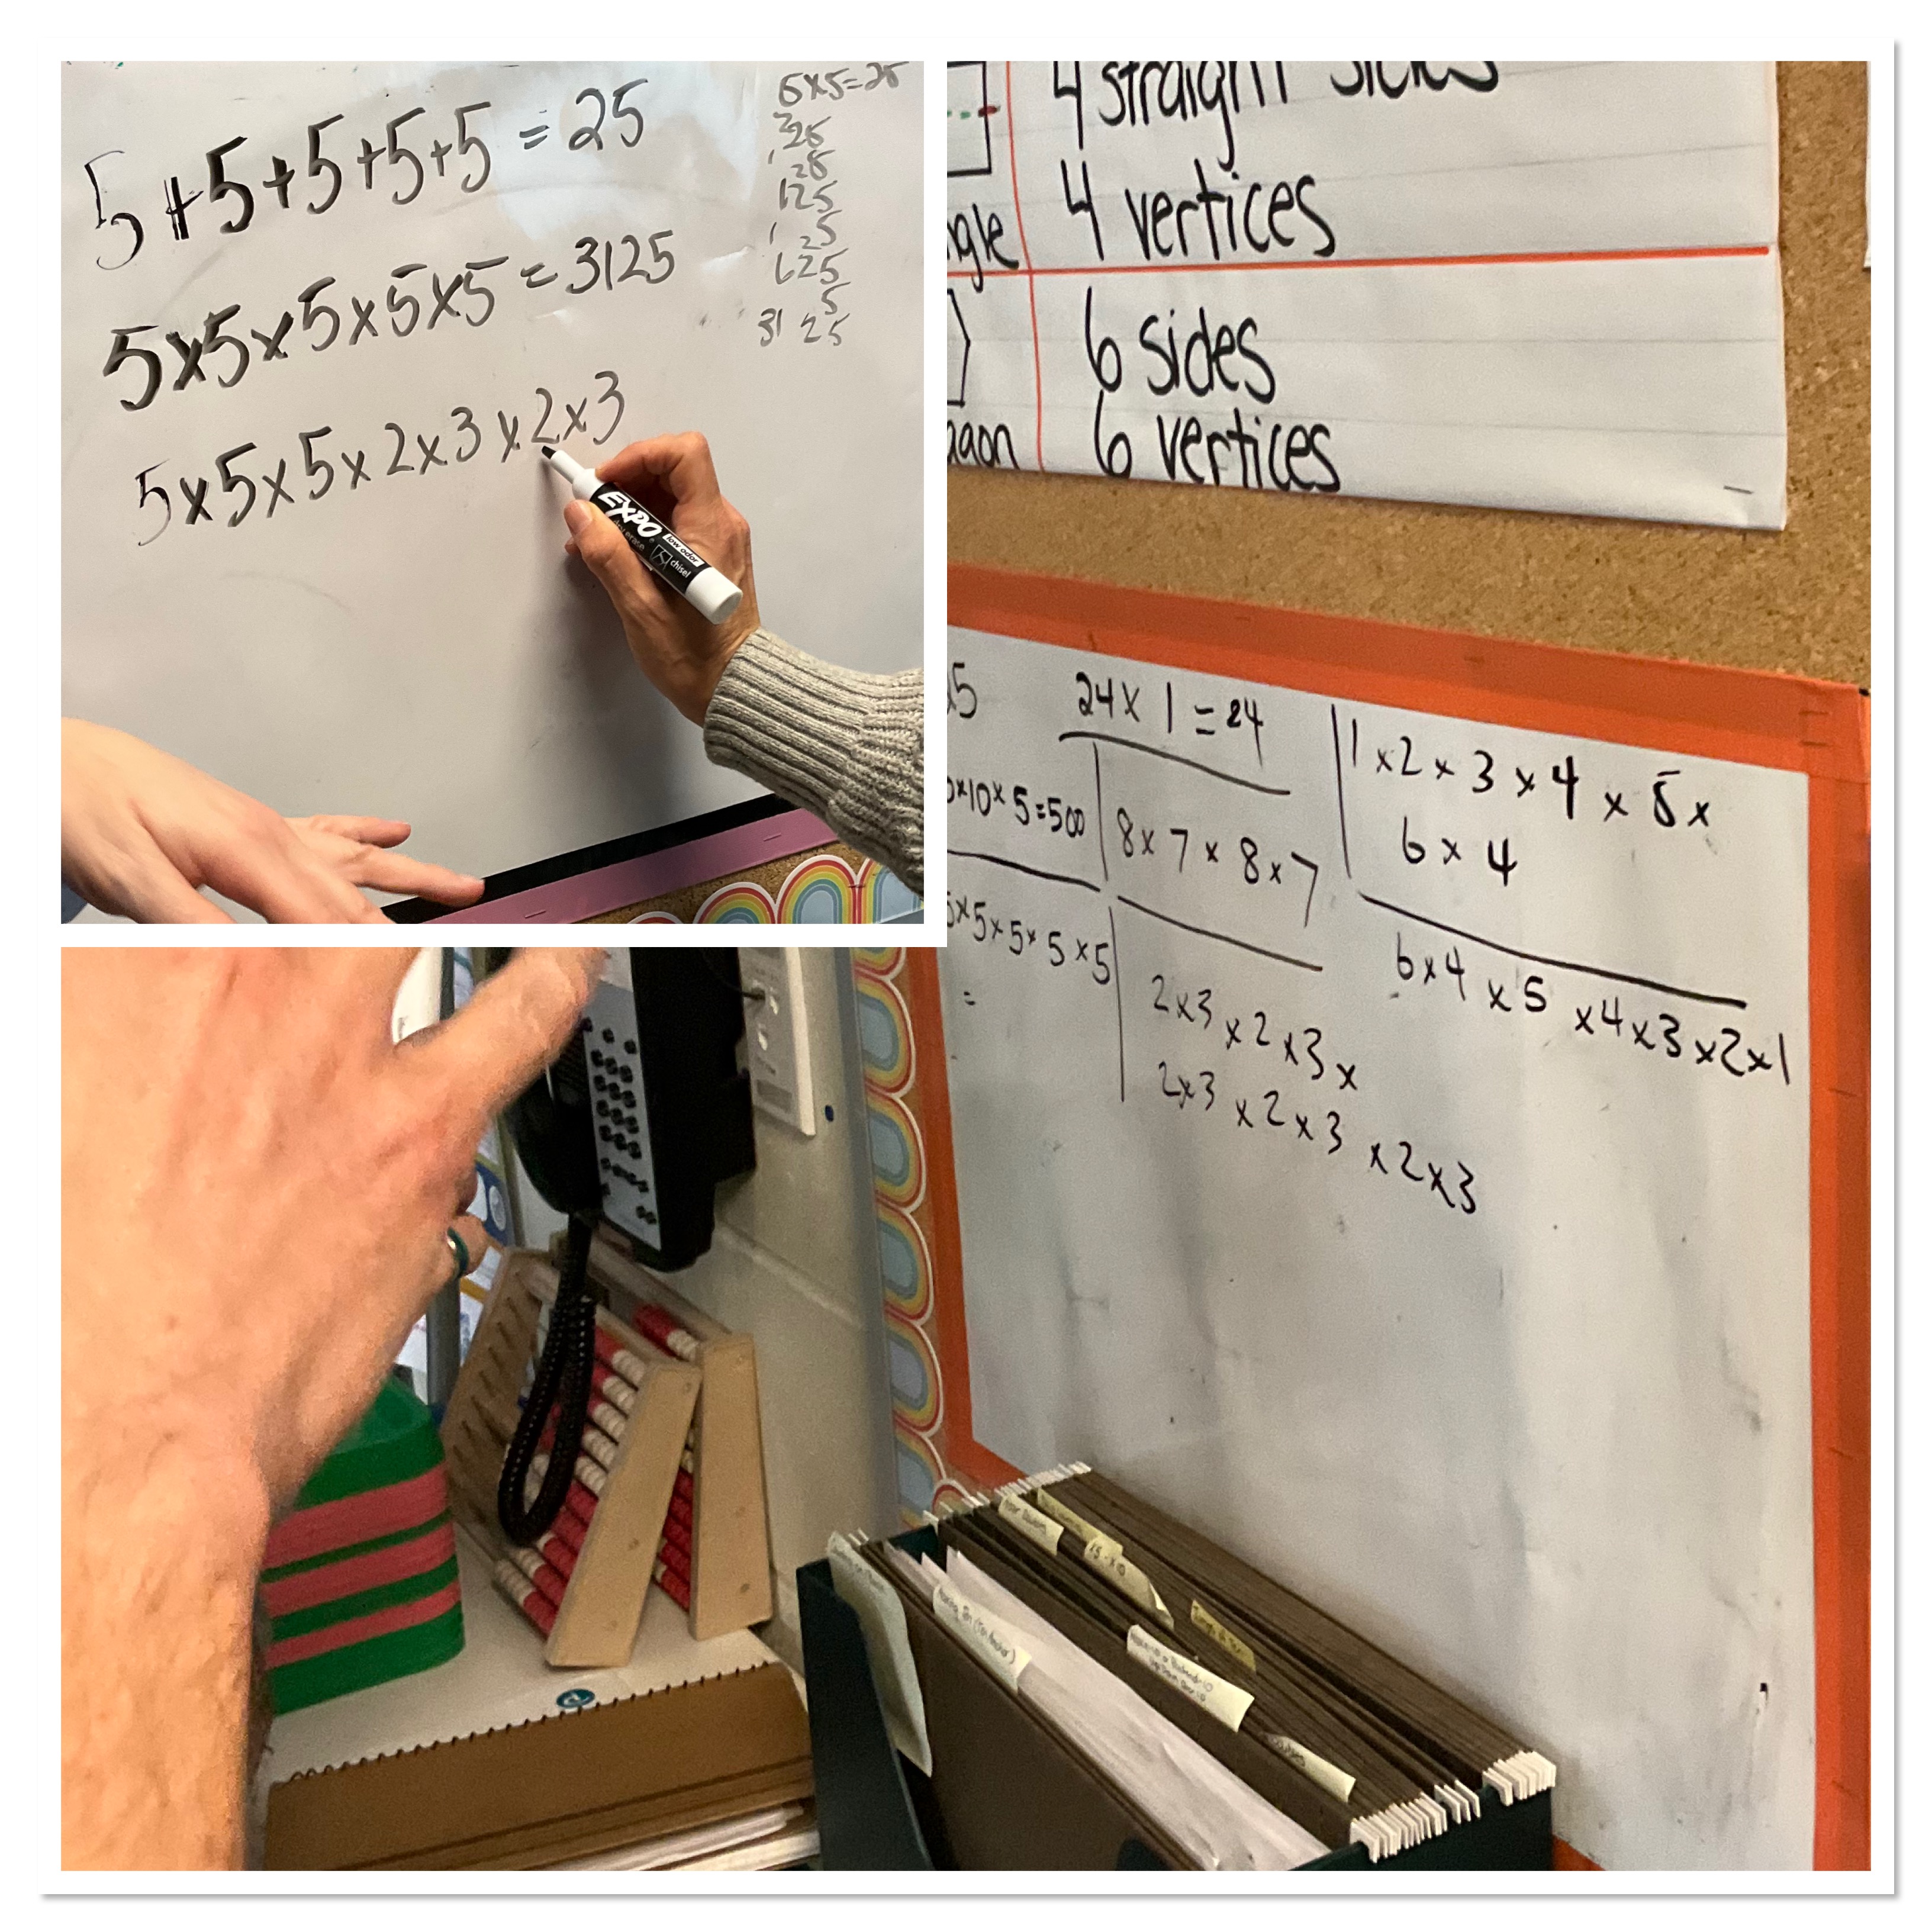
Next we did a thinking classroom style problem at the walls. The prompts were to break up 25 into pieces. All the pieces will add to 25. Next change the addition to multiplication and look for the biggest product.

It was neat to see how teachers of various grades tackled the question in different ways. Different groups imposed different frameworks and constraints. We haven’t yet got to the largest product, but some are still working away at it.
It was a great opportunity to share some of what we are doing at KSS with educators in our feeder schools. We are glad of the invitation and hope to go again in the spring and share some more tasks.
Similarity and Proportions
We looked at similar triangles today in grade 9 as a way to practice ratios and scale factors. We did a few examples, and made a pseudocode to calculate the proportionality constant between the similar triangles, and then students had some questions to solve in groups up at the walls.
We’re trying to work in some pseudocode as we go this year so it’s not a shock when we look at EQAO preparation.

It has been helpful because students can look at the algorithm in code and then use it to help them with the process.

We’re getting better at expressing our steps and solving equations with proportions.
Fractions
For our fraction warm up today we counted by 1/4 around our table groups. To make it more interesting or a bigger challenge we added clapping on the whole numbers and then stomping on the half numbers. We then tried it as a whole class with 16 people present. The next challenge was to put on a number line where we’d end up if we went 3 times around the room, or 5 times around the room counting by 1/4. The final thought experiment was, if we counted by 1/5 how many times around the room would we need to get to a number between 20 and 30? It was a good introduction and got us thinking about unit fractions.
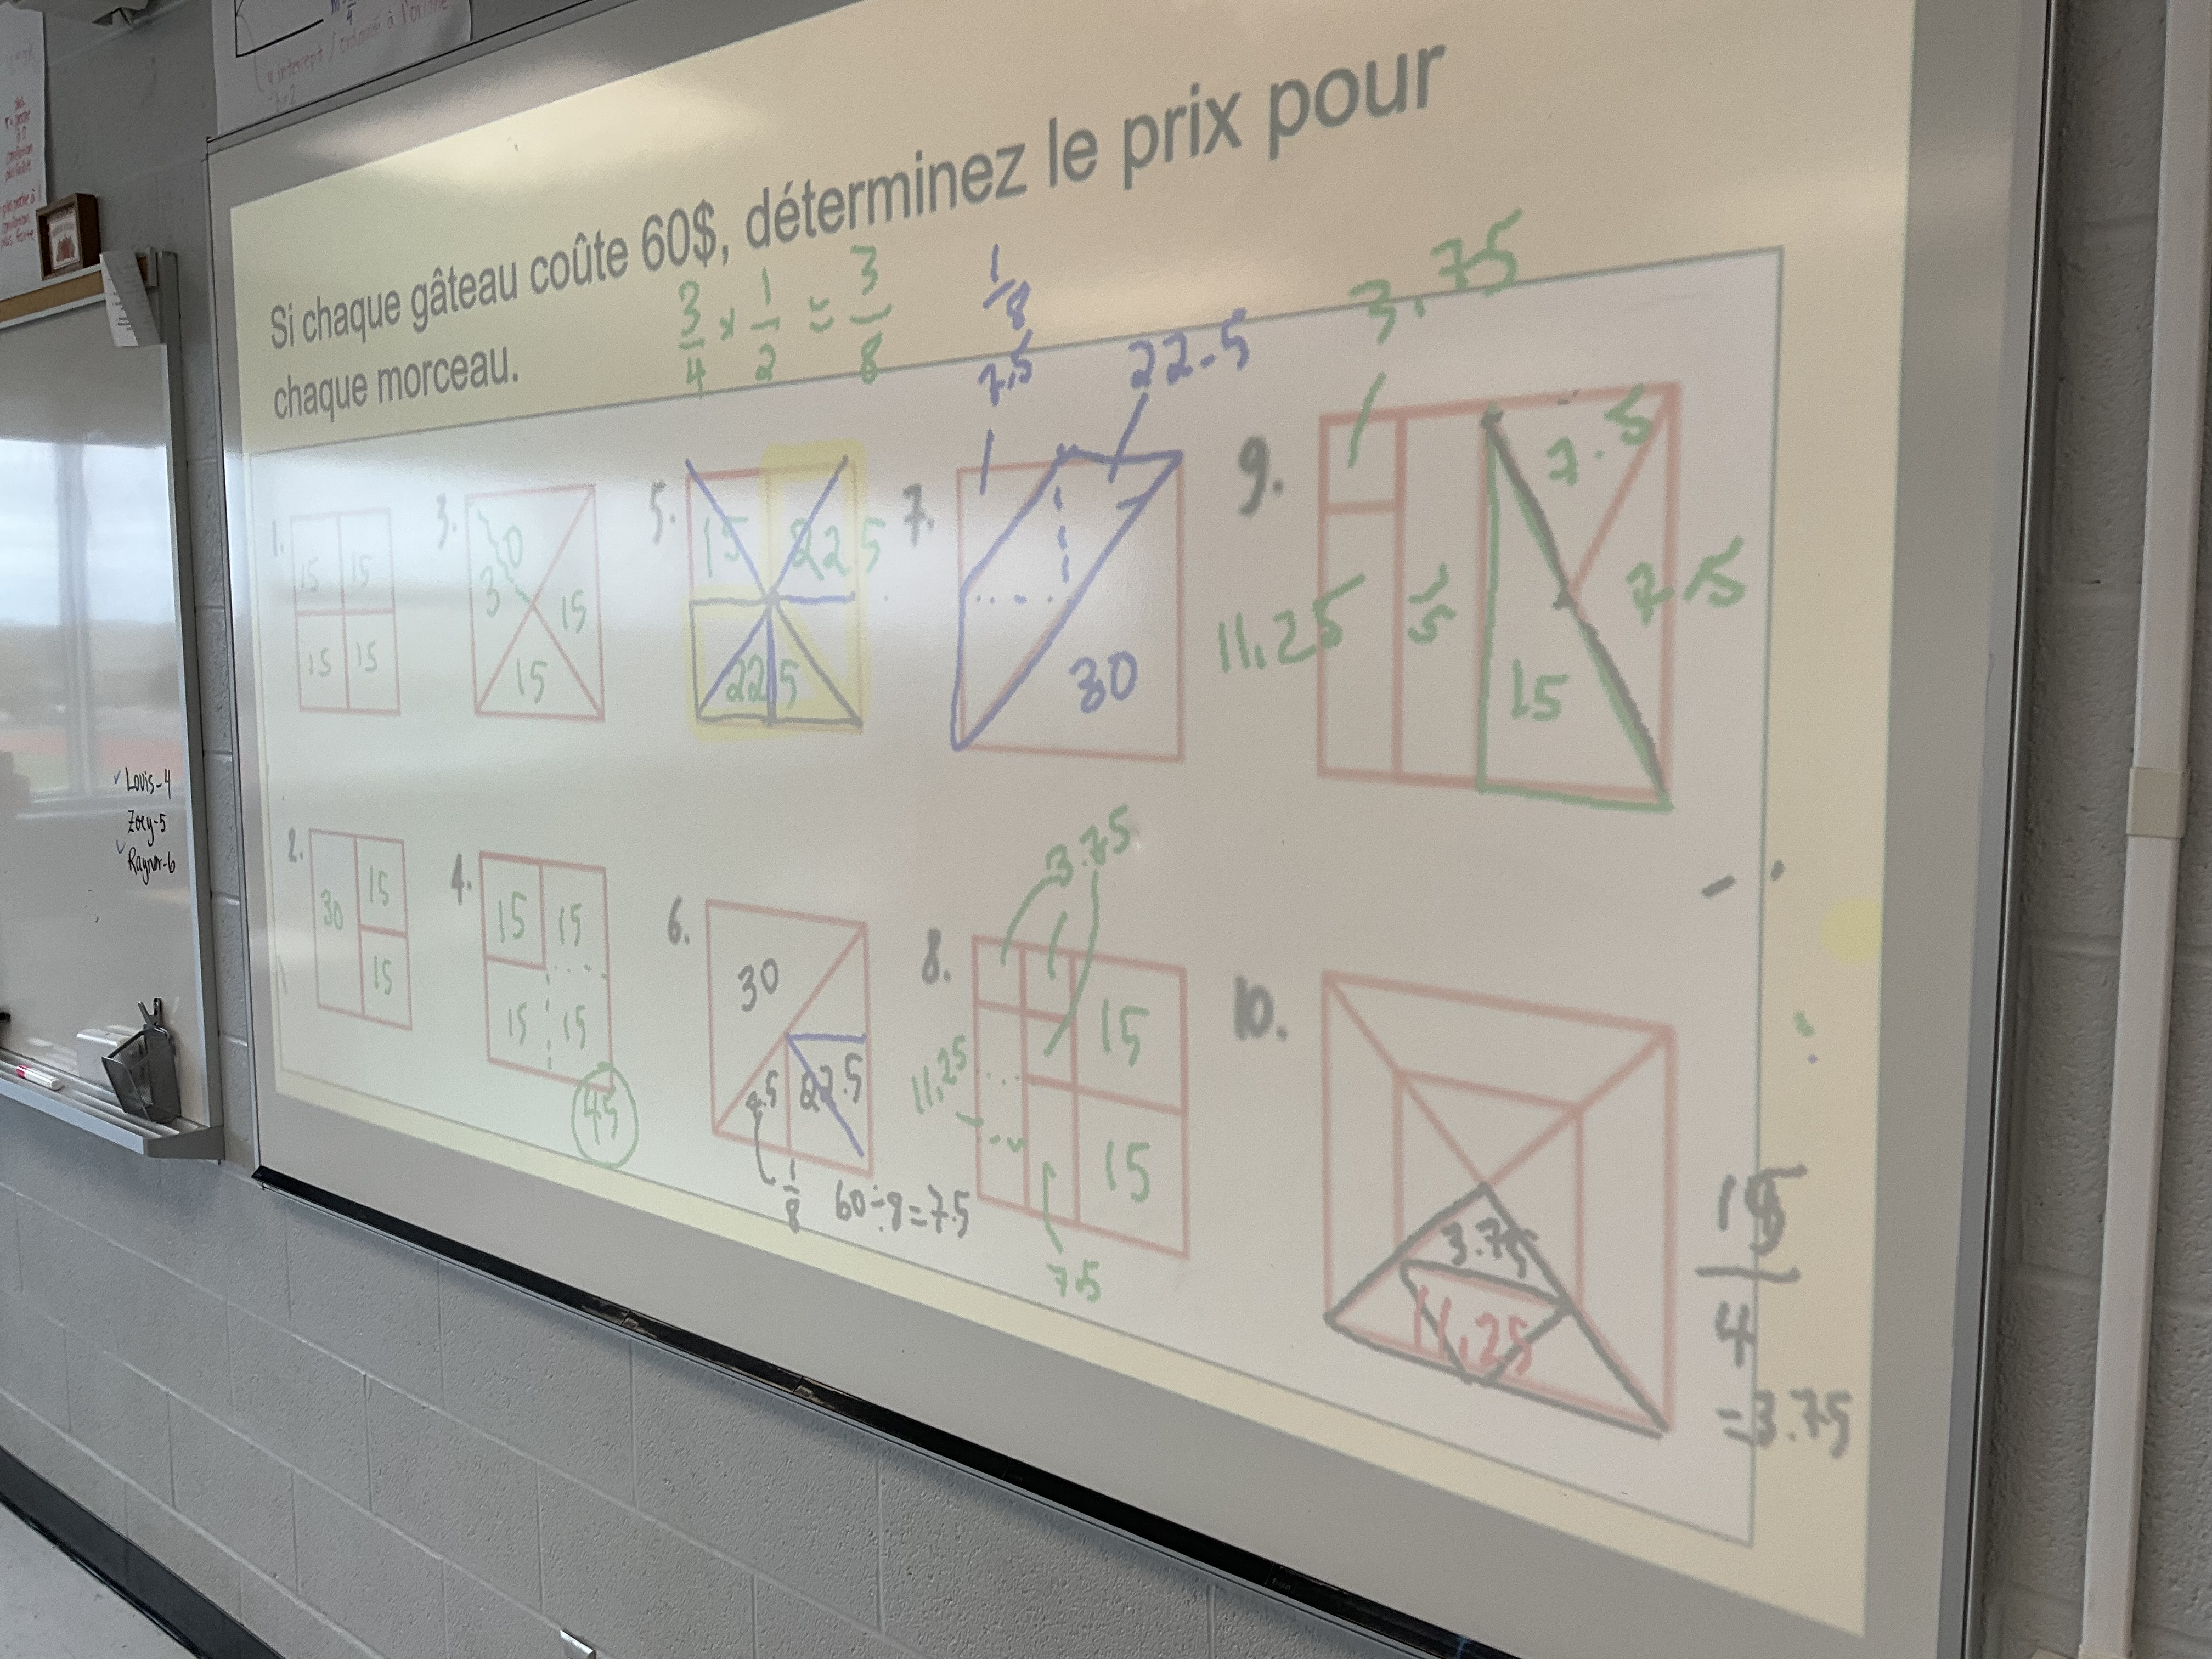
Next we got up to the boards and tried to put price tags on these pieces of cake. A very creative baker decided to cut cake in some interesting ways. Each cake costs 60$.

Groups had different approaches to their calculating. Some looked at fractions, some divided the 60 up, and some did both! Groups were drawing extra lines to subdivide pieces and help them figure things out.

We consolidated all the thinking together before moving on to look at ratios and fractions.
We know that 1:7 is comparing 1 to 7, and we can write it as a fraction 1/7. We can also say that 1 and 7 are both parts, so the whole would be 8, and we can make fractions of 1/8 and 7/8 as well. This is helpful when we are solving ratio problems.
The question we had next was to make a bag of trail mix that is in a ratio of 2:3:4 sunflower seeds: raisins: peanuts. If we want 600 grams total how many grams of each ingredient do we need to mix?

It was great to see their different ways of presenting their work to show their understanding, and how they verified their work to check that it made sense and was reasonable.
Bucket of Zeros
This morning I had the pleasure of working with some of our grade 7/8 teachers as they practiced using the bucket of zeros as a way of visualizing and making integer work concrete.

It was great to see the intentionality of the sequence that they are using, and how they plan to integrate bucket of zeros, and number lines, group practice and individual practice, and games and problem solving. It opened my eyes to what happens in grade 7/8! I’m thankful to have had the opportunity to sit in and work with them this morning.
Fractions Decimals Percents
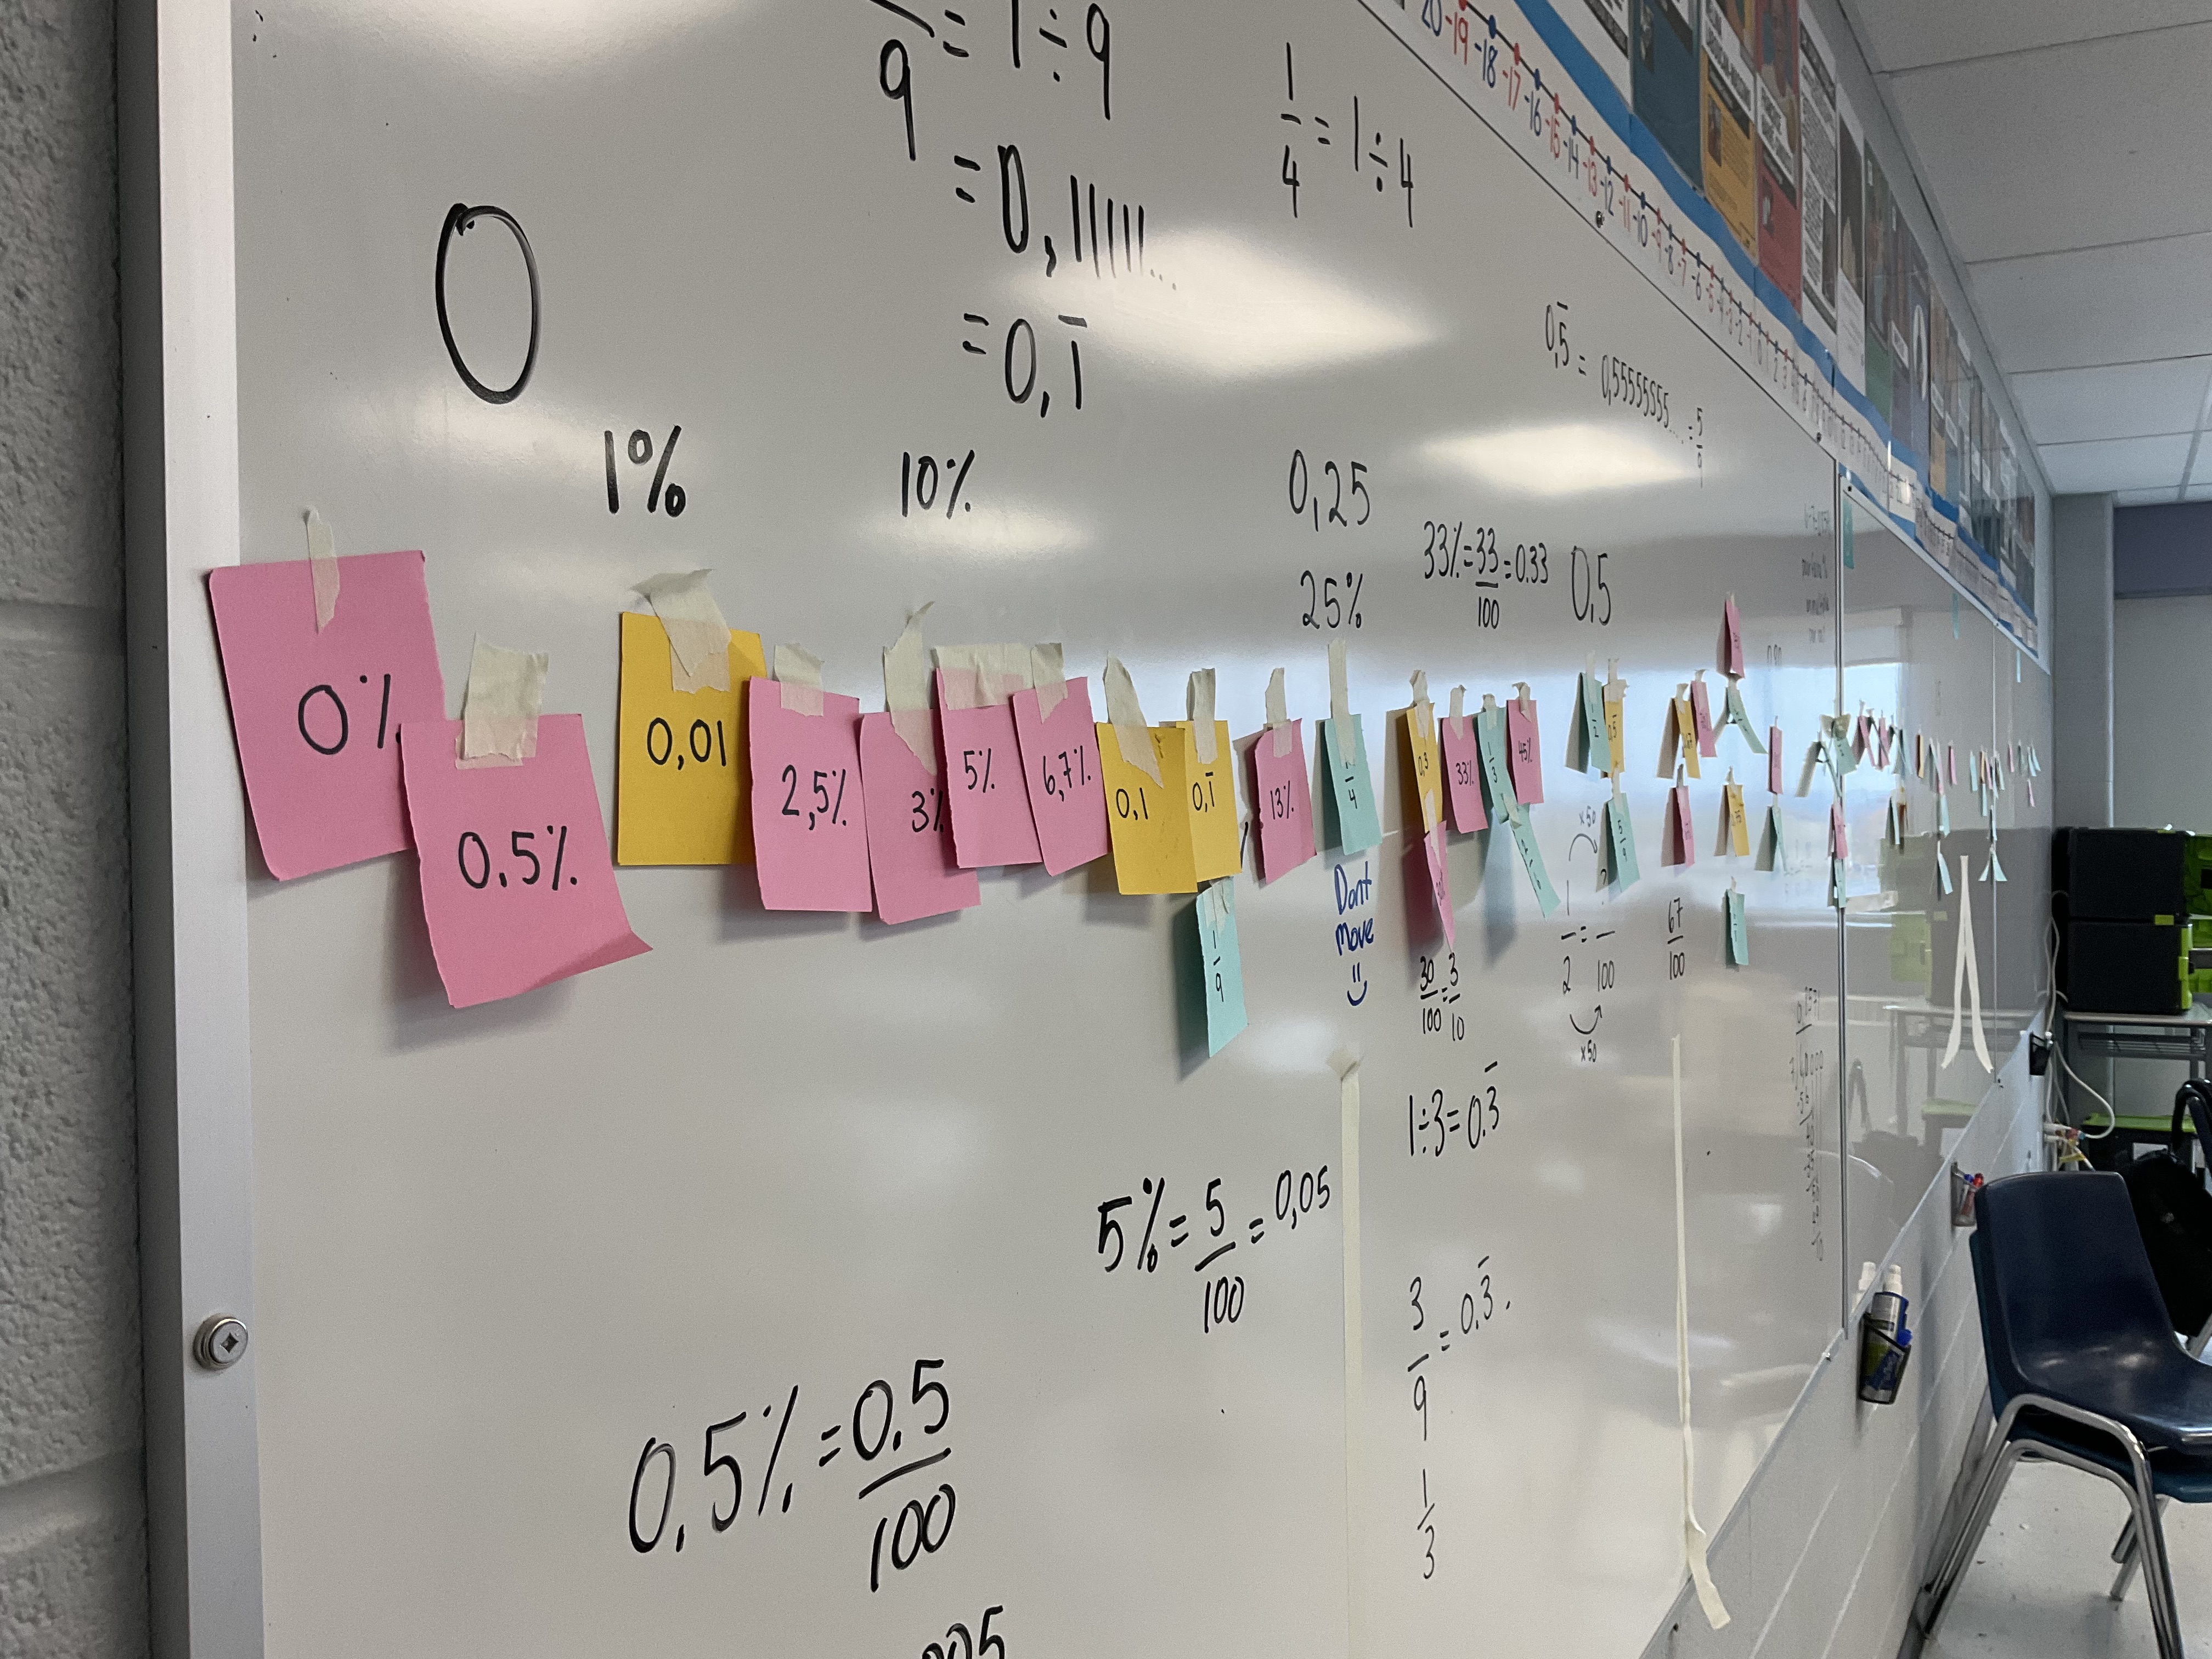
We added to our wall of fractions and decimals today. We now can slot percentages into the mix.
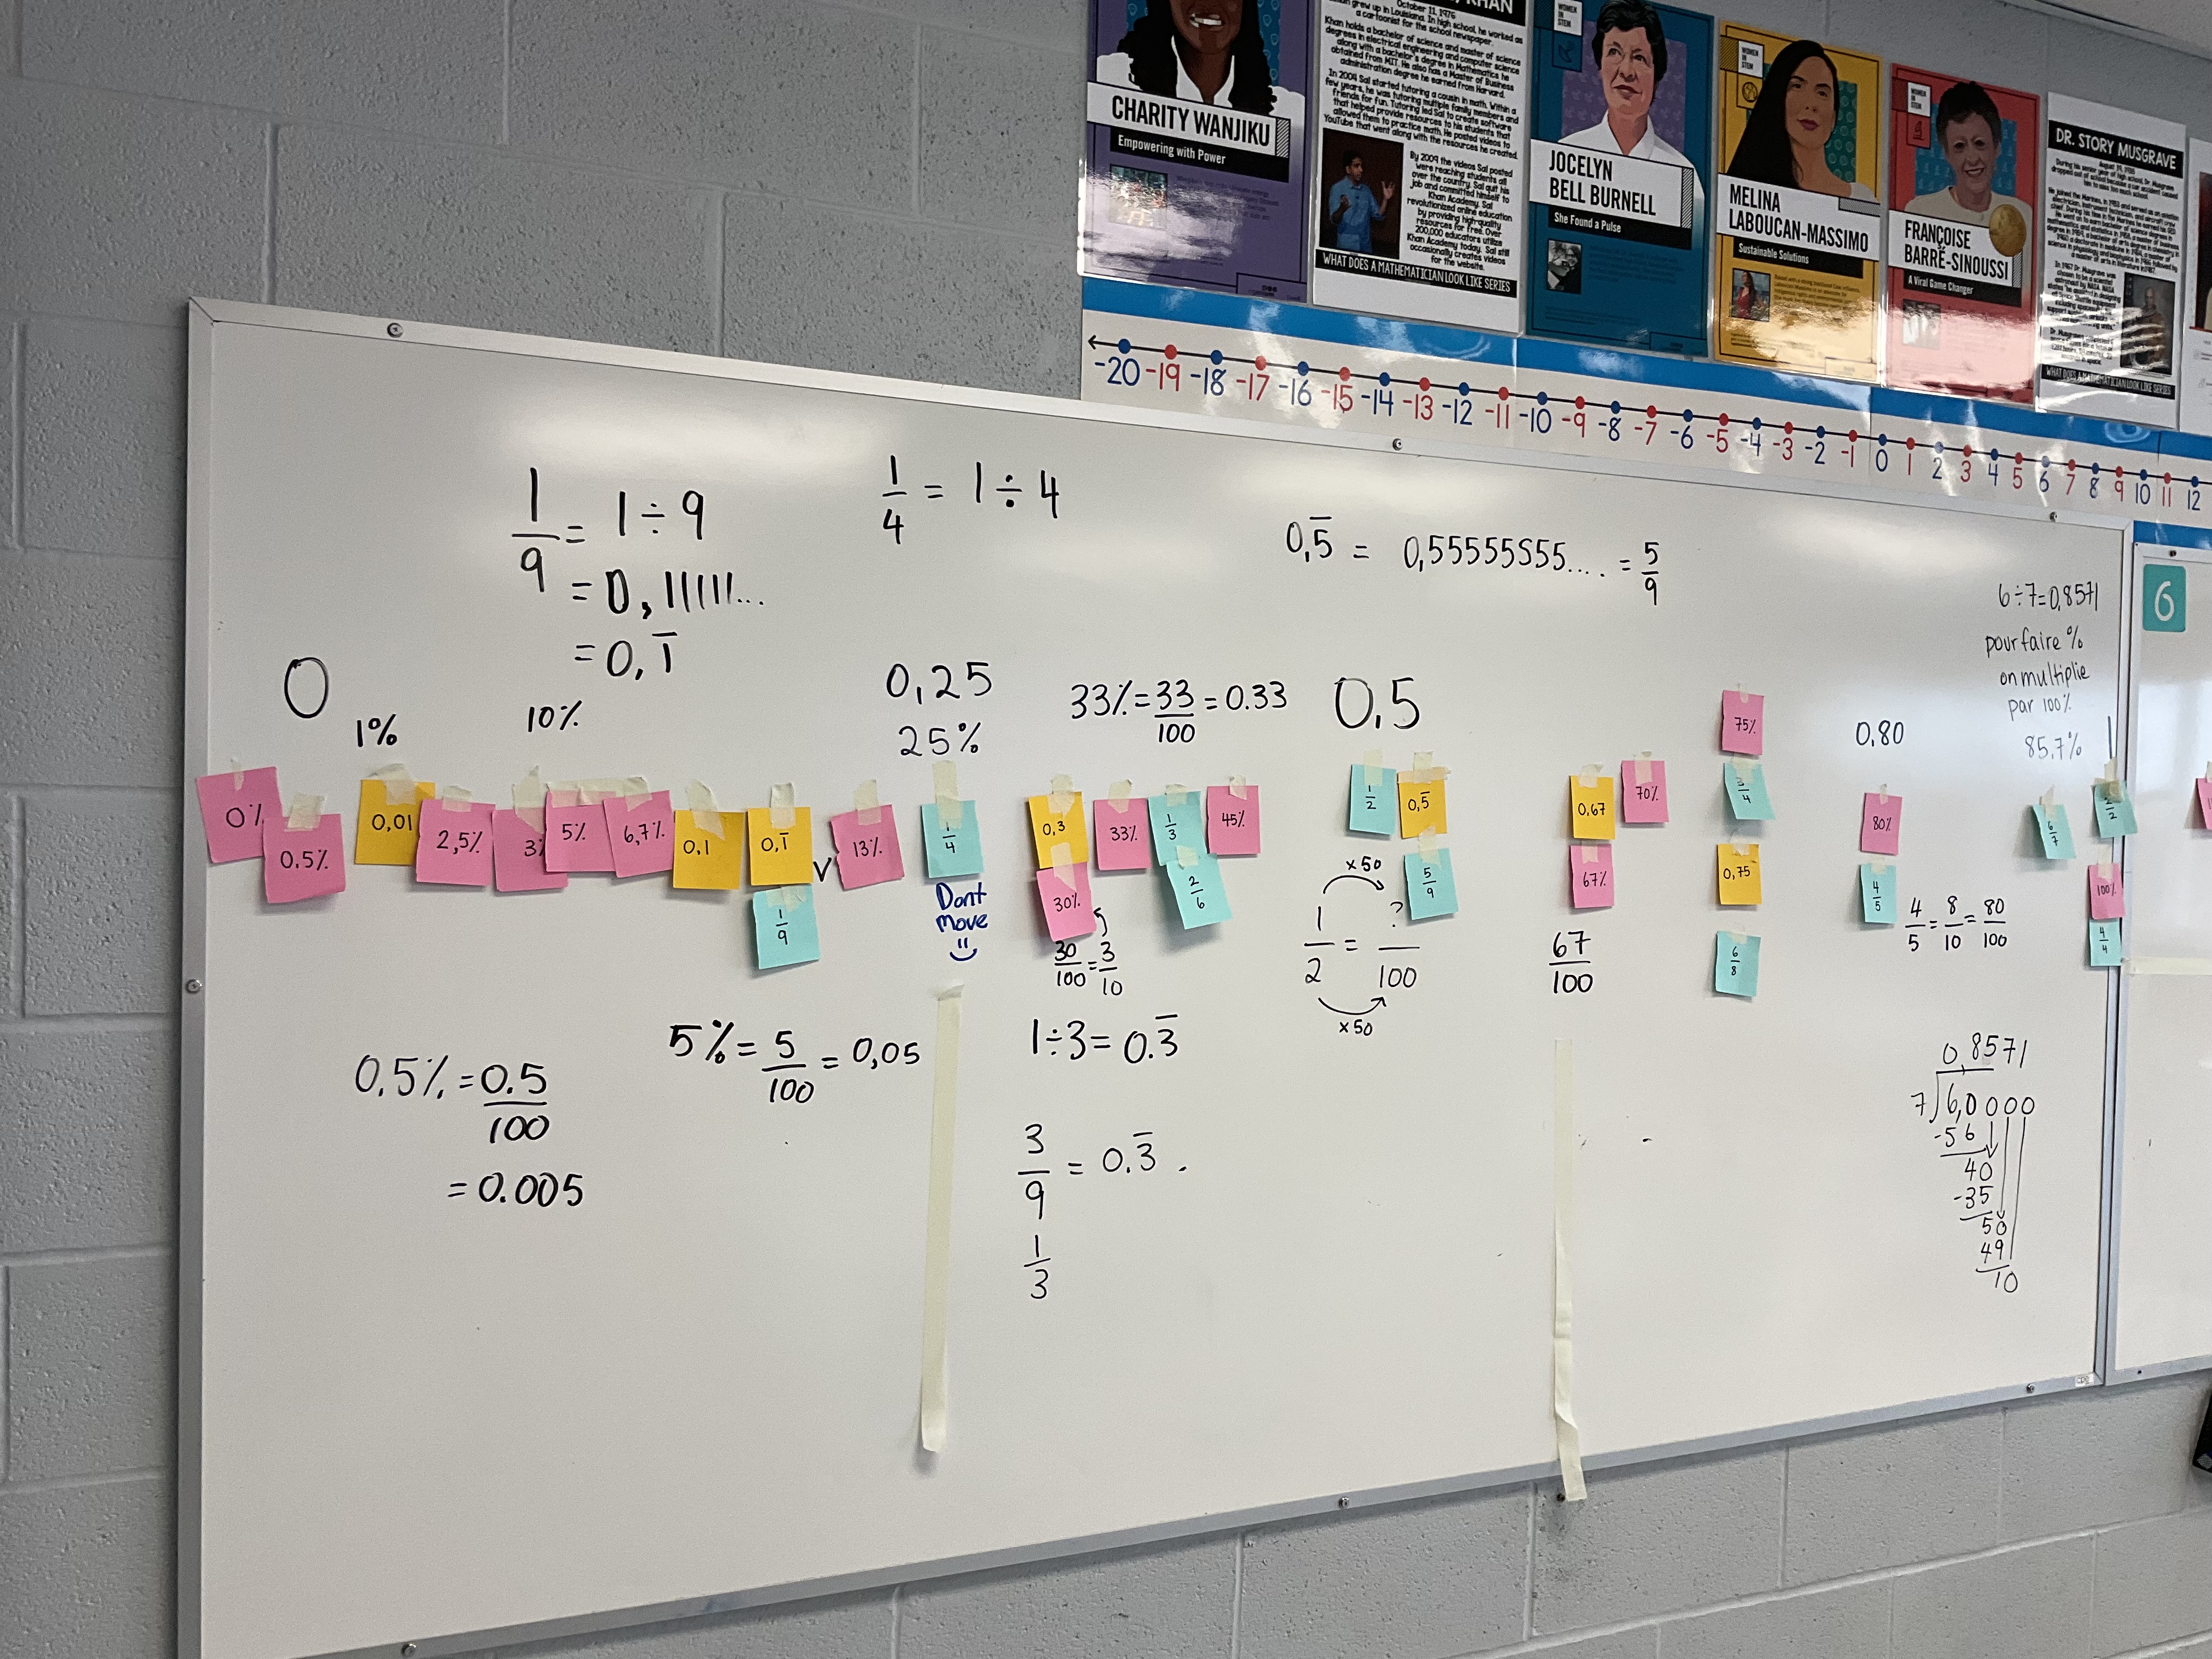
We took some time to verify the order of all of the cards, and showed some equivalences written in other forms. We noticed some challenges with small percents for example 0.2% is 0.2/100 which is 2/1000 or 1/500. In decimal form it is 0.002 (we divide percents by 100 to write them as decimals.
We also learned that fractions with denominator of 9 have a neat property. 4/9=0.44444444, 5/9=0.5555555 7/9=0.7777777
We looked at some financial implications (calculating sales tax, or looking at inflation percentages, and looking at percentage appreciation ans depreciation).
impressive collaboration today to get all these cards sorted out!
Fractions
Today in grade 9 we had a look at some fraction fluency. We practiced counting by “one eighths” and we clapped when we got to a whole number. We also worked on representing fractions, and what the numerators (parts) and denominators (total number of pieces) mean. We coloured in 1/2 in multiple ways. We know that 2/4=1/2 and 4/8=1/2 and 8/16=1/2.

Next our challenge was a card sorting task as a class. In 3 small groups students sorted through cards with fractions or decimal values on them. Each group ordered their stack of cards. We had some interesting conversations about equivalent expressions, or improper fractions and mixed numbers, or what does 0.3 with the line mean compared to 0.3 without a line over the 3.

Each group chose someone to take the smallest value that they had over to one side of the whiteboard, and another volunteer to take their largest value to the other side of the whiteboard. They had a chat to decide on the smallest and largest values in the room. We then had the edges of our number line, and worked together as a class to put all of the values in order.

There was a lot of rearranging and sorting things out as all groups merged their lists.
Next we added some benchmark values and tried to get our spacing accurate.

Tomorrow we’ll put some percentages in the mix and see if we can manage the new challenge!
Surface Area and Volume
Grade 10s have been working on surface area and volume calculations, but it seems to be overwhelming everyone a bit. For some it’s knowing the difference between surface area and volume, for others it’s that the formula sheet has so many letters and equations, and for others they don’t know how to substitute in values and solve.
We gathered everyone together and did a few examples together and they wrote down an example solution for them to follow.


We also had a look at some different nets and how they come together to make prisms and pyramids.

Hopefully we can remember and use our example next week when we do more of these questions.
Fractions
In MTH1W we were working on doing BEDMAS questions with fractions, and my students had had enough halfway through the period. They asked to do something else, or to have a “fun Friday”.
I pulled the question from our math club for grownups.

We extended the pattern, and wrote the fractions in improper form.
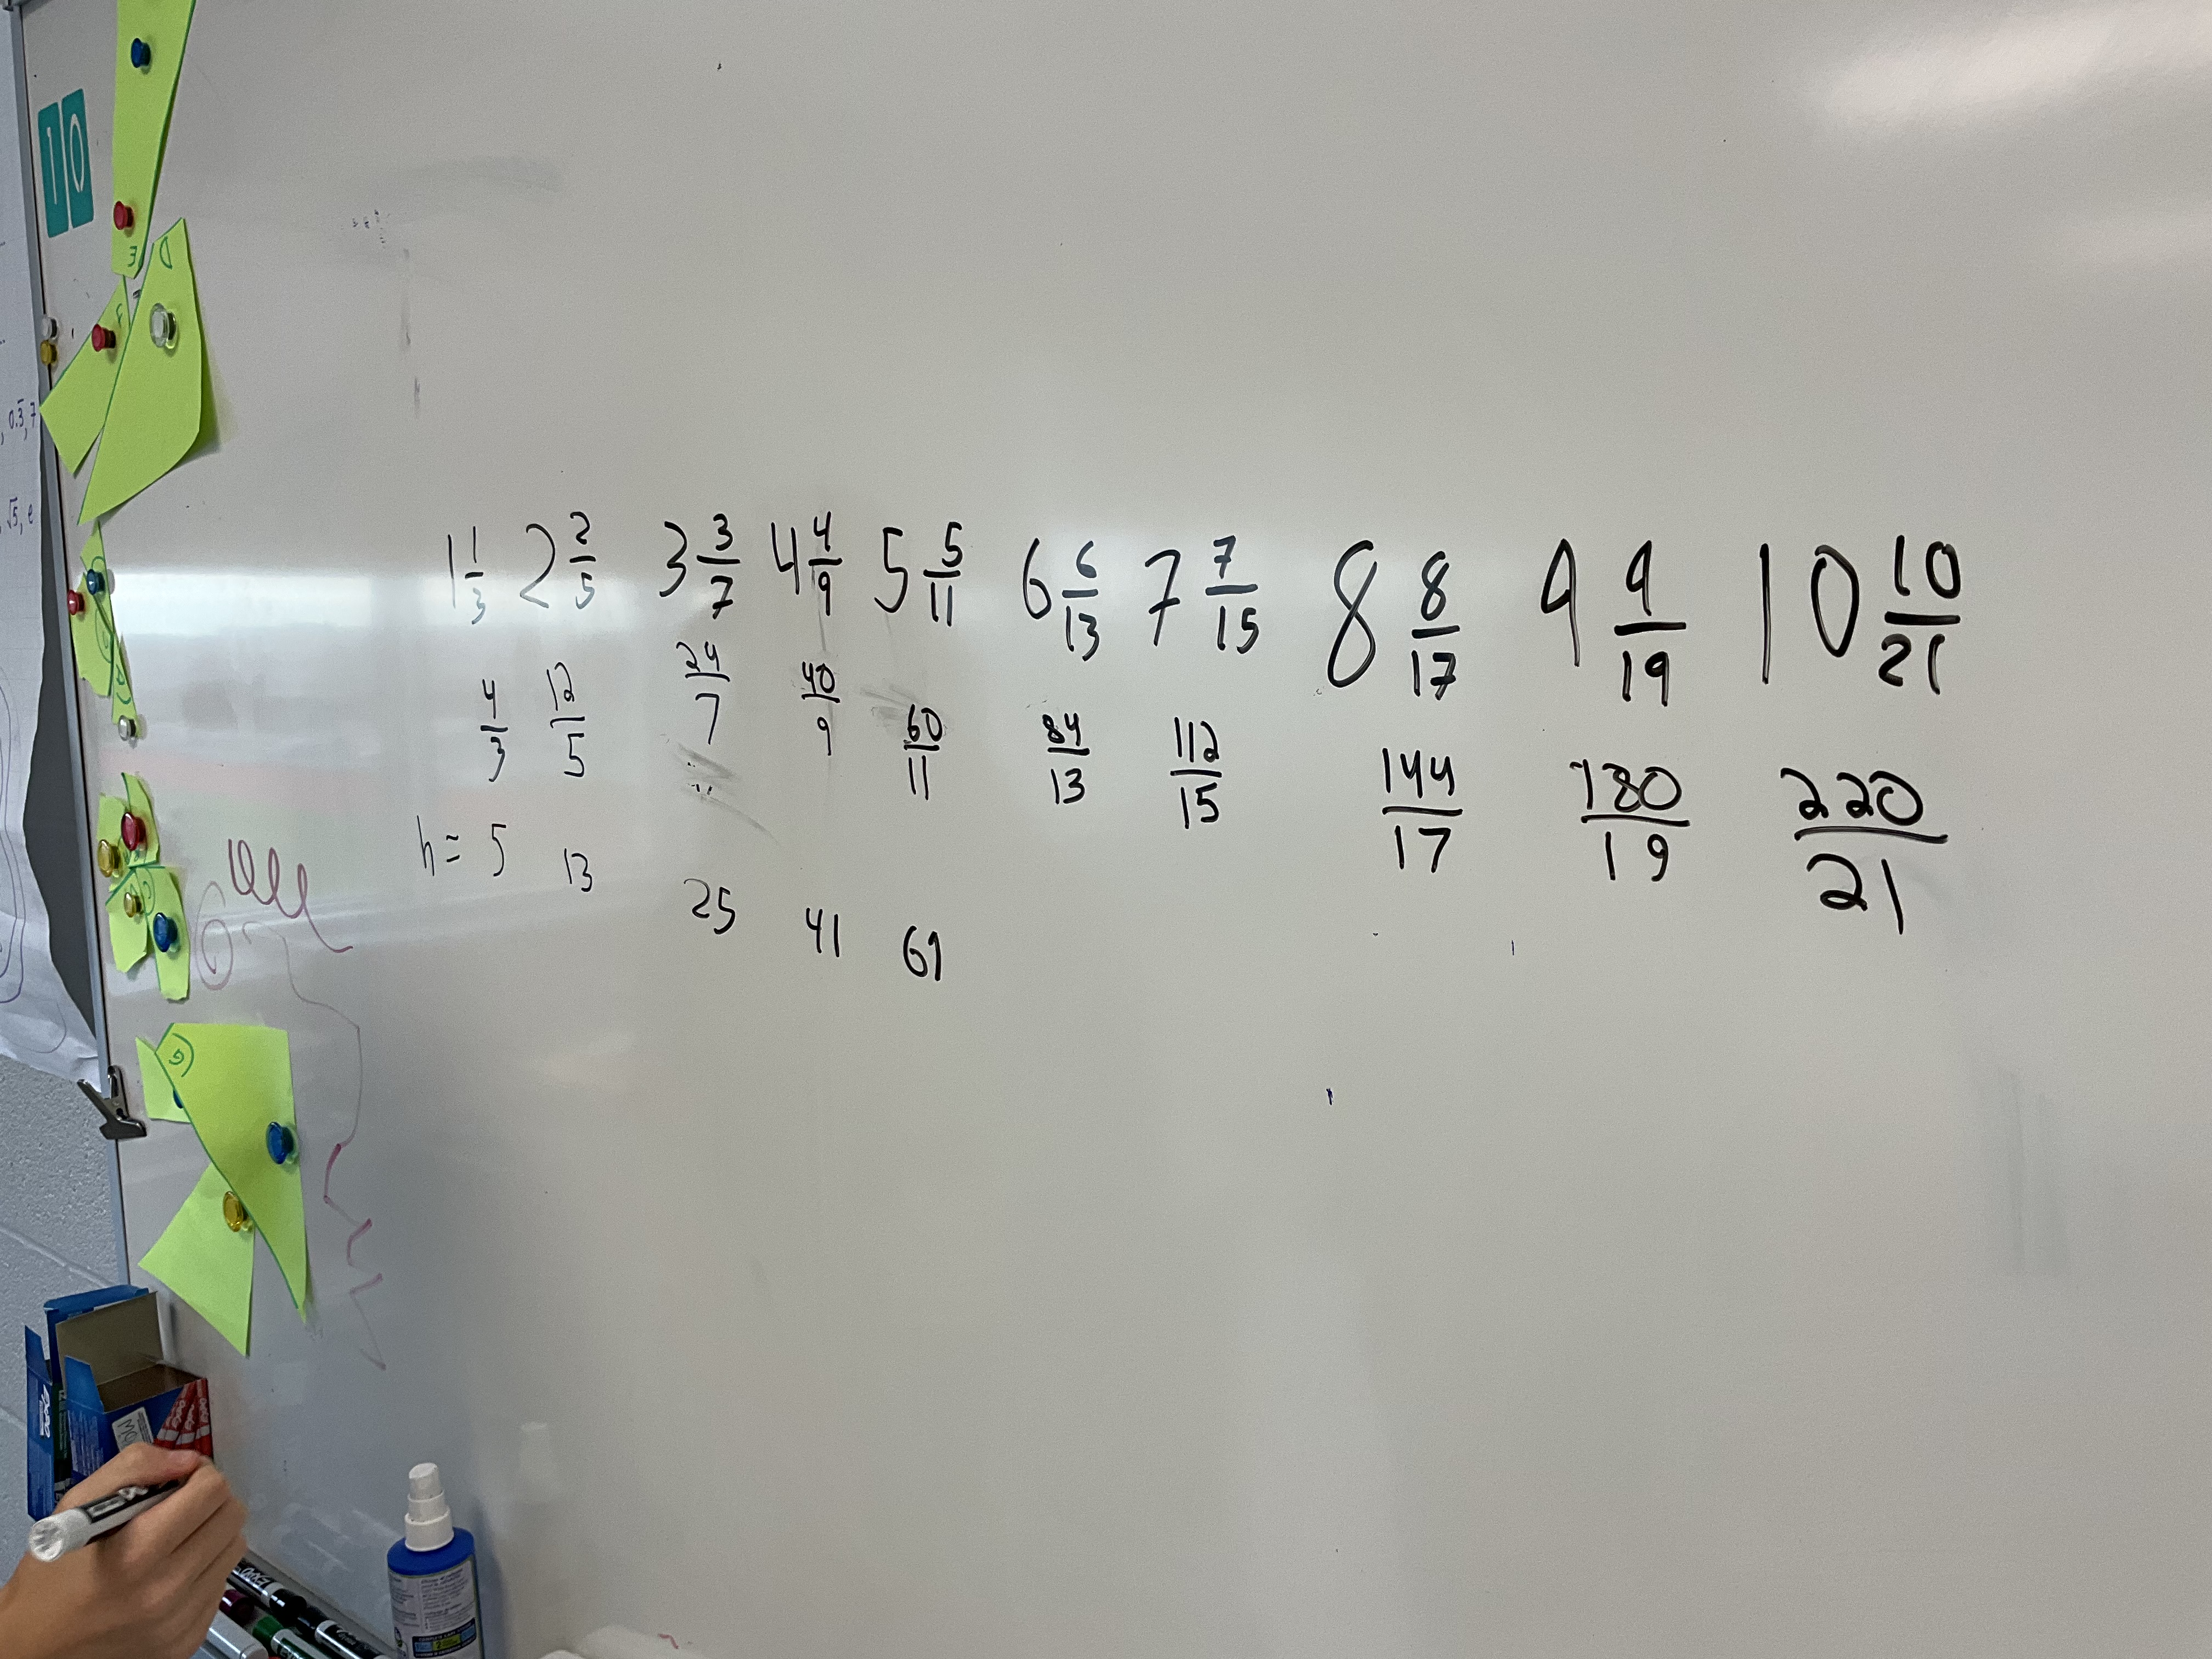
One group got excited about exploring these fractions as percents, and others were keen to use my prompt of “use the numerator and denominator as legs of right triangles” to explore and practice Pythagorean Theorem calculations.

I’m glad they knew to ask for something different to work on. This was a much more fun way to end out the week.
Math Club For Grown Ups
We had our 2nd meeting of the math club for grown ups. The first meeting was in June last year. We’re getting together as educators/admin/board office staff/EAs/teacher candidates (hence the all encompassing word “grown ups”) and doing math together.
We did several questions.
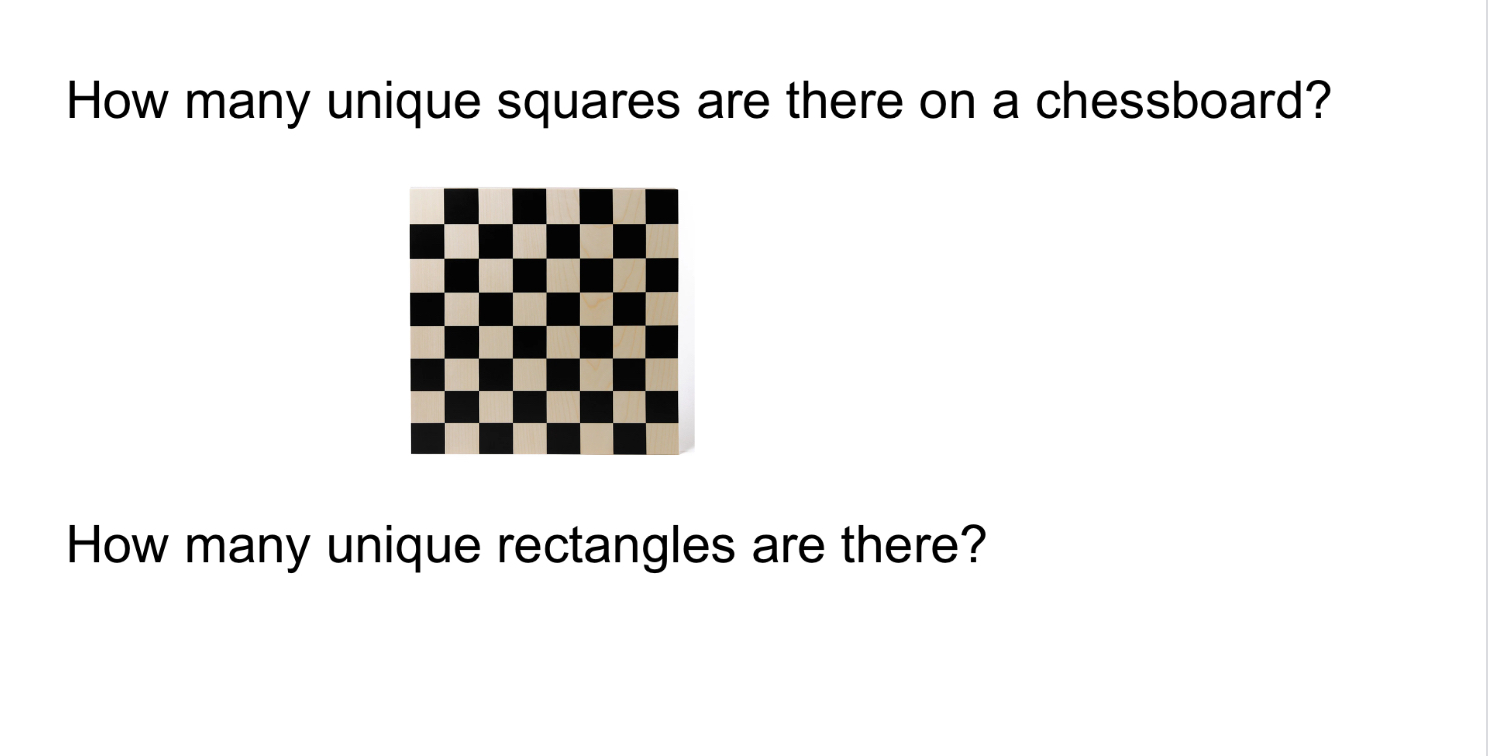
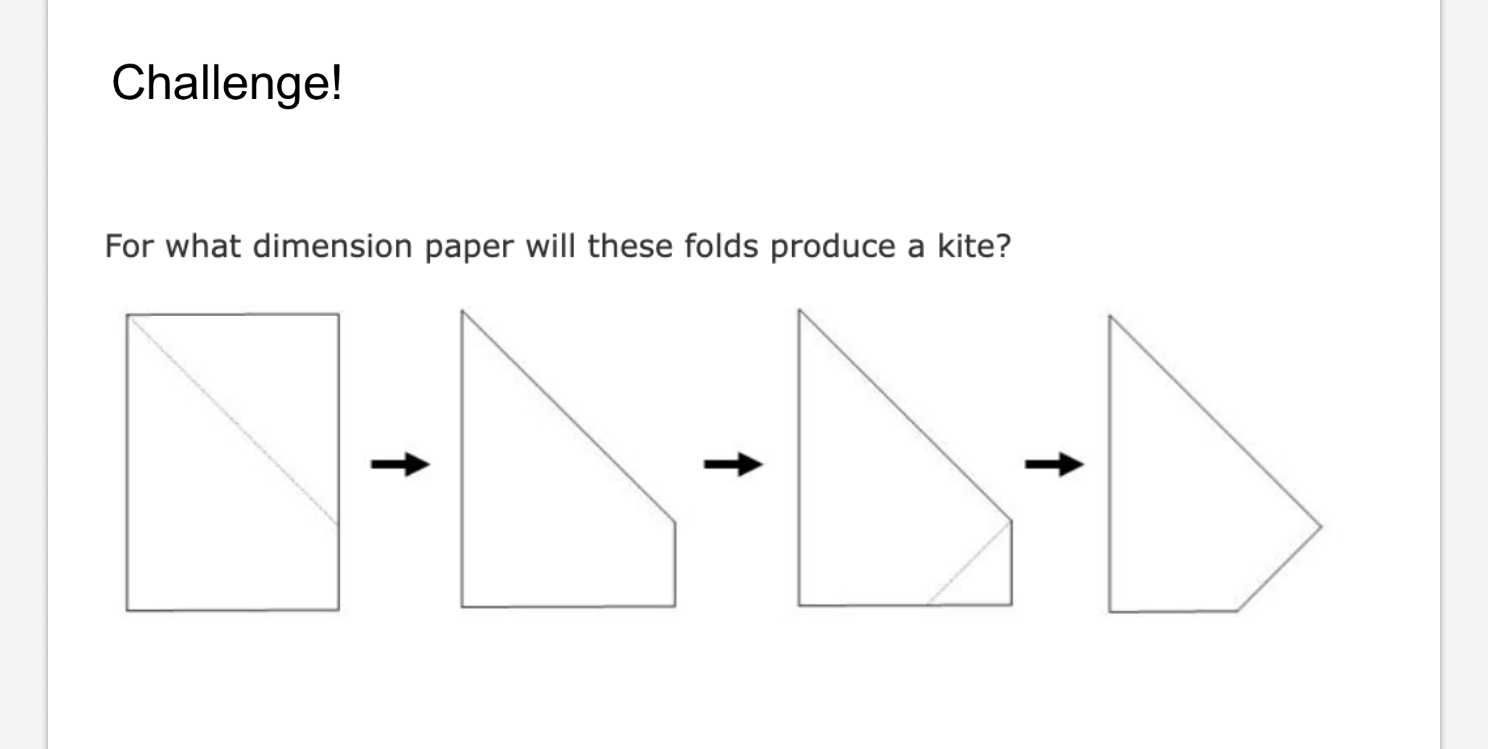

We worked on the questions in random groups and got pretty close to solving them. Part of the fun is deciding what steps to take to solve them.


It was such fun to work with colleagues from 4 different high schools, and 2 of our feeder schools, and to have our principal and several superintendents doing math all together. We look forward to another meeting in December.
The questions for this meeting came from Peter Liljedahl’s old website of good problems for teachers, and from Al Overwijk’s site slamdunkmath. Have a look there for the sequence and ideas pulled from the sequence of fractions.
Similarity and Area
I’ve been working with a colleague brainstorming ideas for exploring similarity using pattern blocks. We can make similar shapes quite nicely, and prove they are similar because the angles are the same and the side lengths are proportional. We can see that when the side length changes by a factor of 3 the area changes by a factor of 9 etc. My colleague took pictures from his class to show what they did. Students noticed that there was a quadratic pattern in the area, since the change was changing by a consistent amount (the 2nd differences are the same).
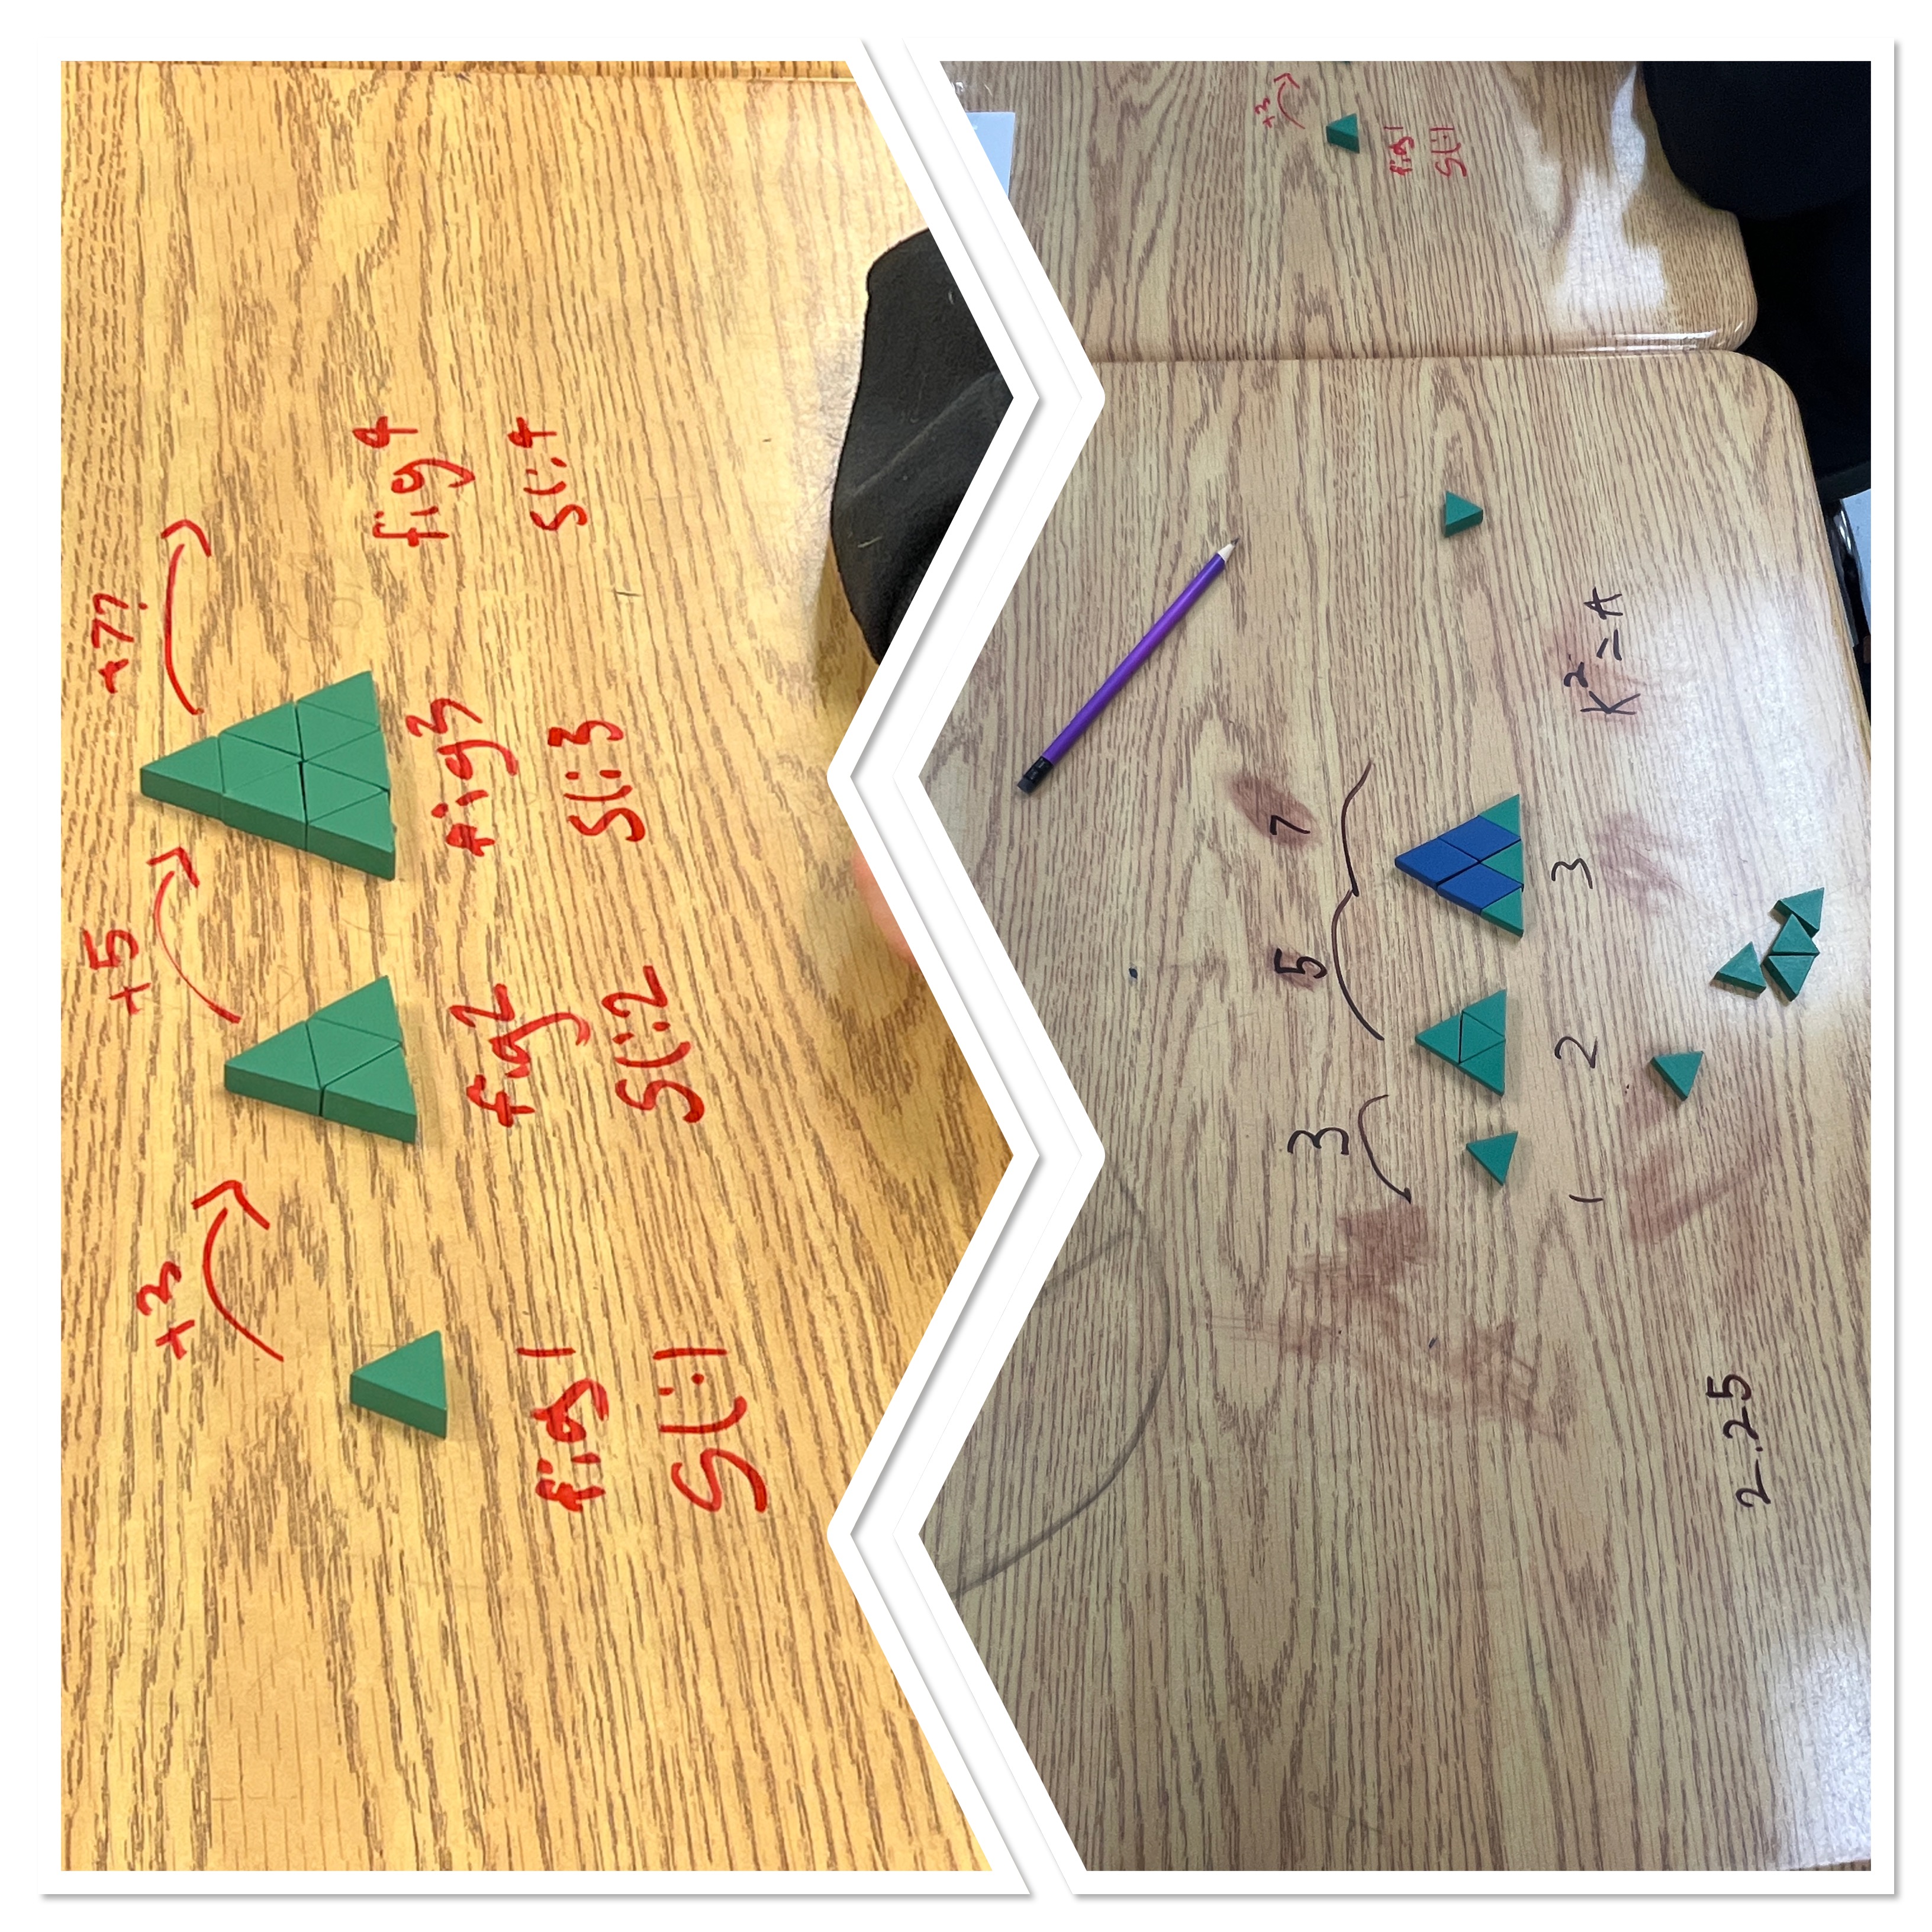
We can do this with other shapes too. This was from my brainstorming.


and this was from my colleagues class. They found creative ways to grow the shapes.

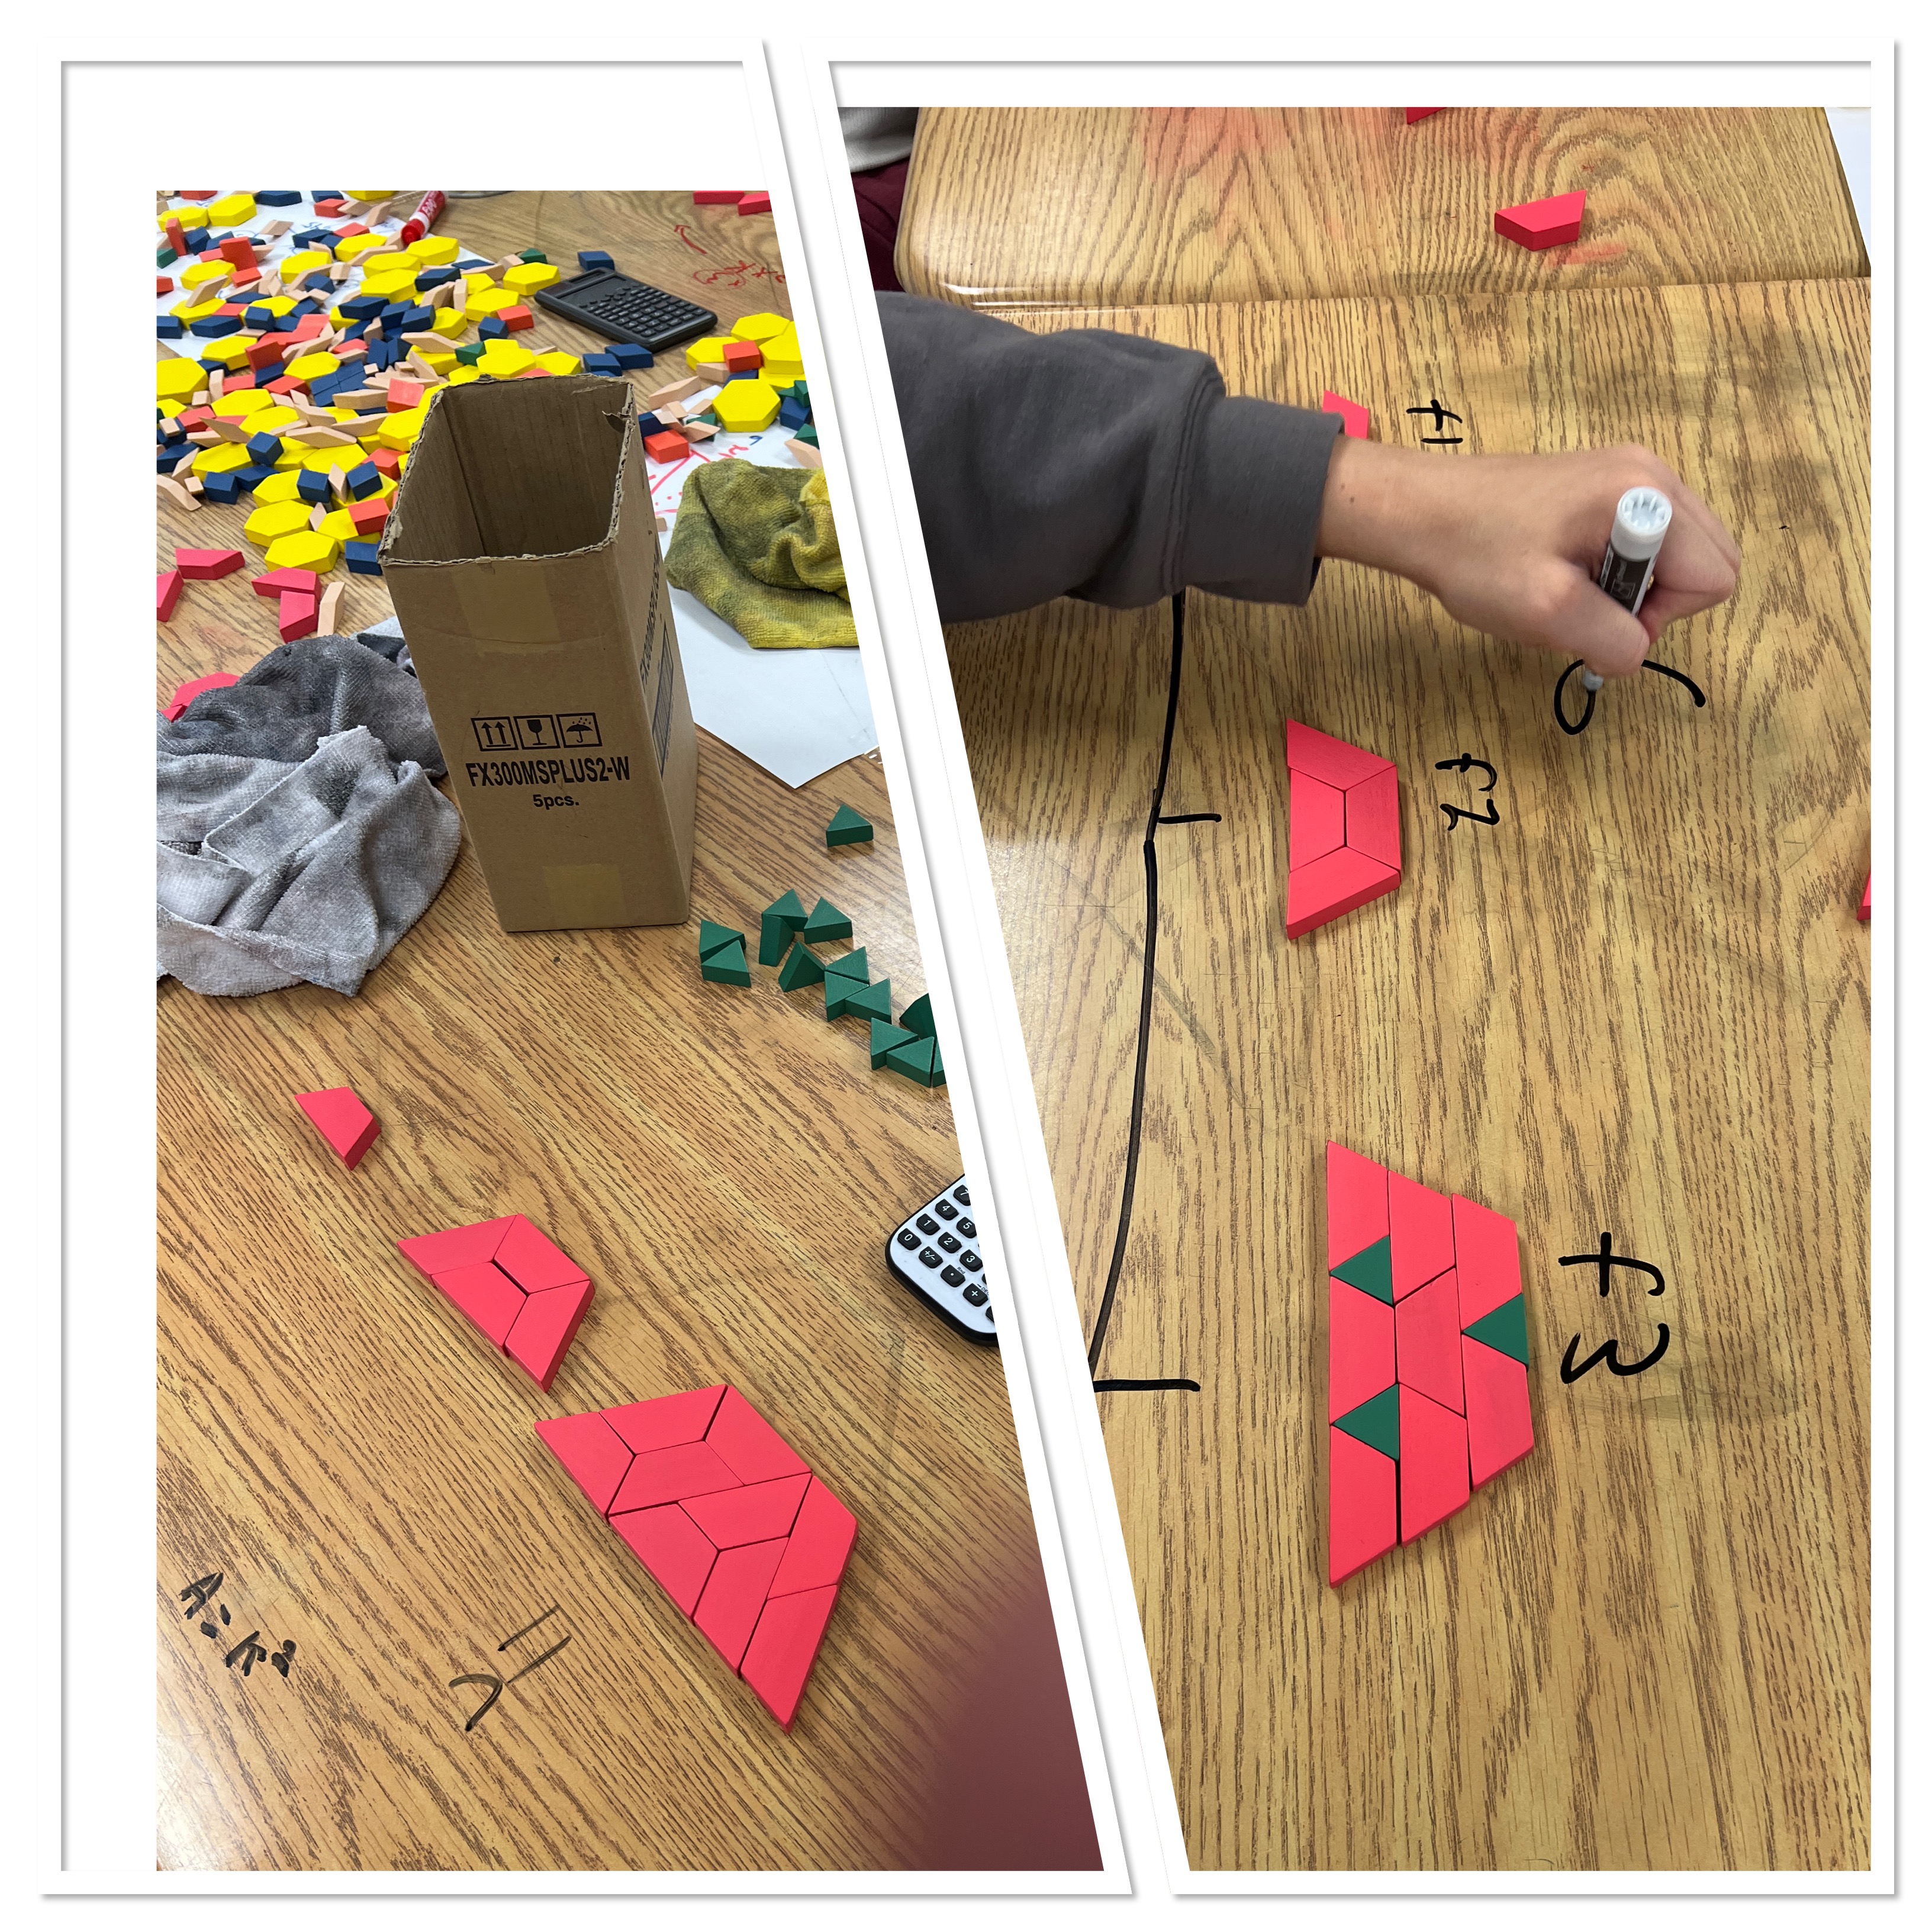
I’m thinking now about how these same pictures could be used later when fractions are discussed.

Students said they enjoyed the task and liked working with the blocks ro show their learning.

